
PingIdentity Directory
Learn how to sync your PingIdentity Directory with your application for automated user provisioning and management using SCIM
This guide helps administrators sync their PingIdentity directory with an application they want to onboard to their organization. Integrating your application with PingIdentity automates user management tasks and ensures access rights stay up-to-date.
Setting up the integration involves two key components:
- Endpoint: This is the URL where PingIdentity sends requests to the application you are onboarding. It acts as a communication point between PingIdentity and your application.
- Bearer Token: This token is used by PingIdentity to authenticate its requests to the endpoint. It ensures that the requests are secure and authorized.
By setting up these components, you enable seamless synchronization between your application and the PingIdentity directory.
-
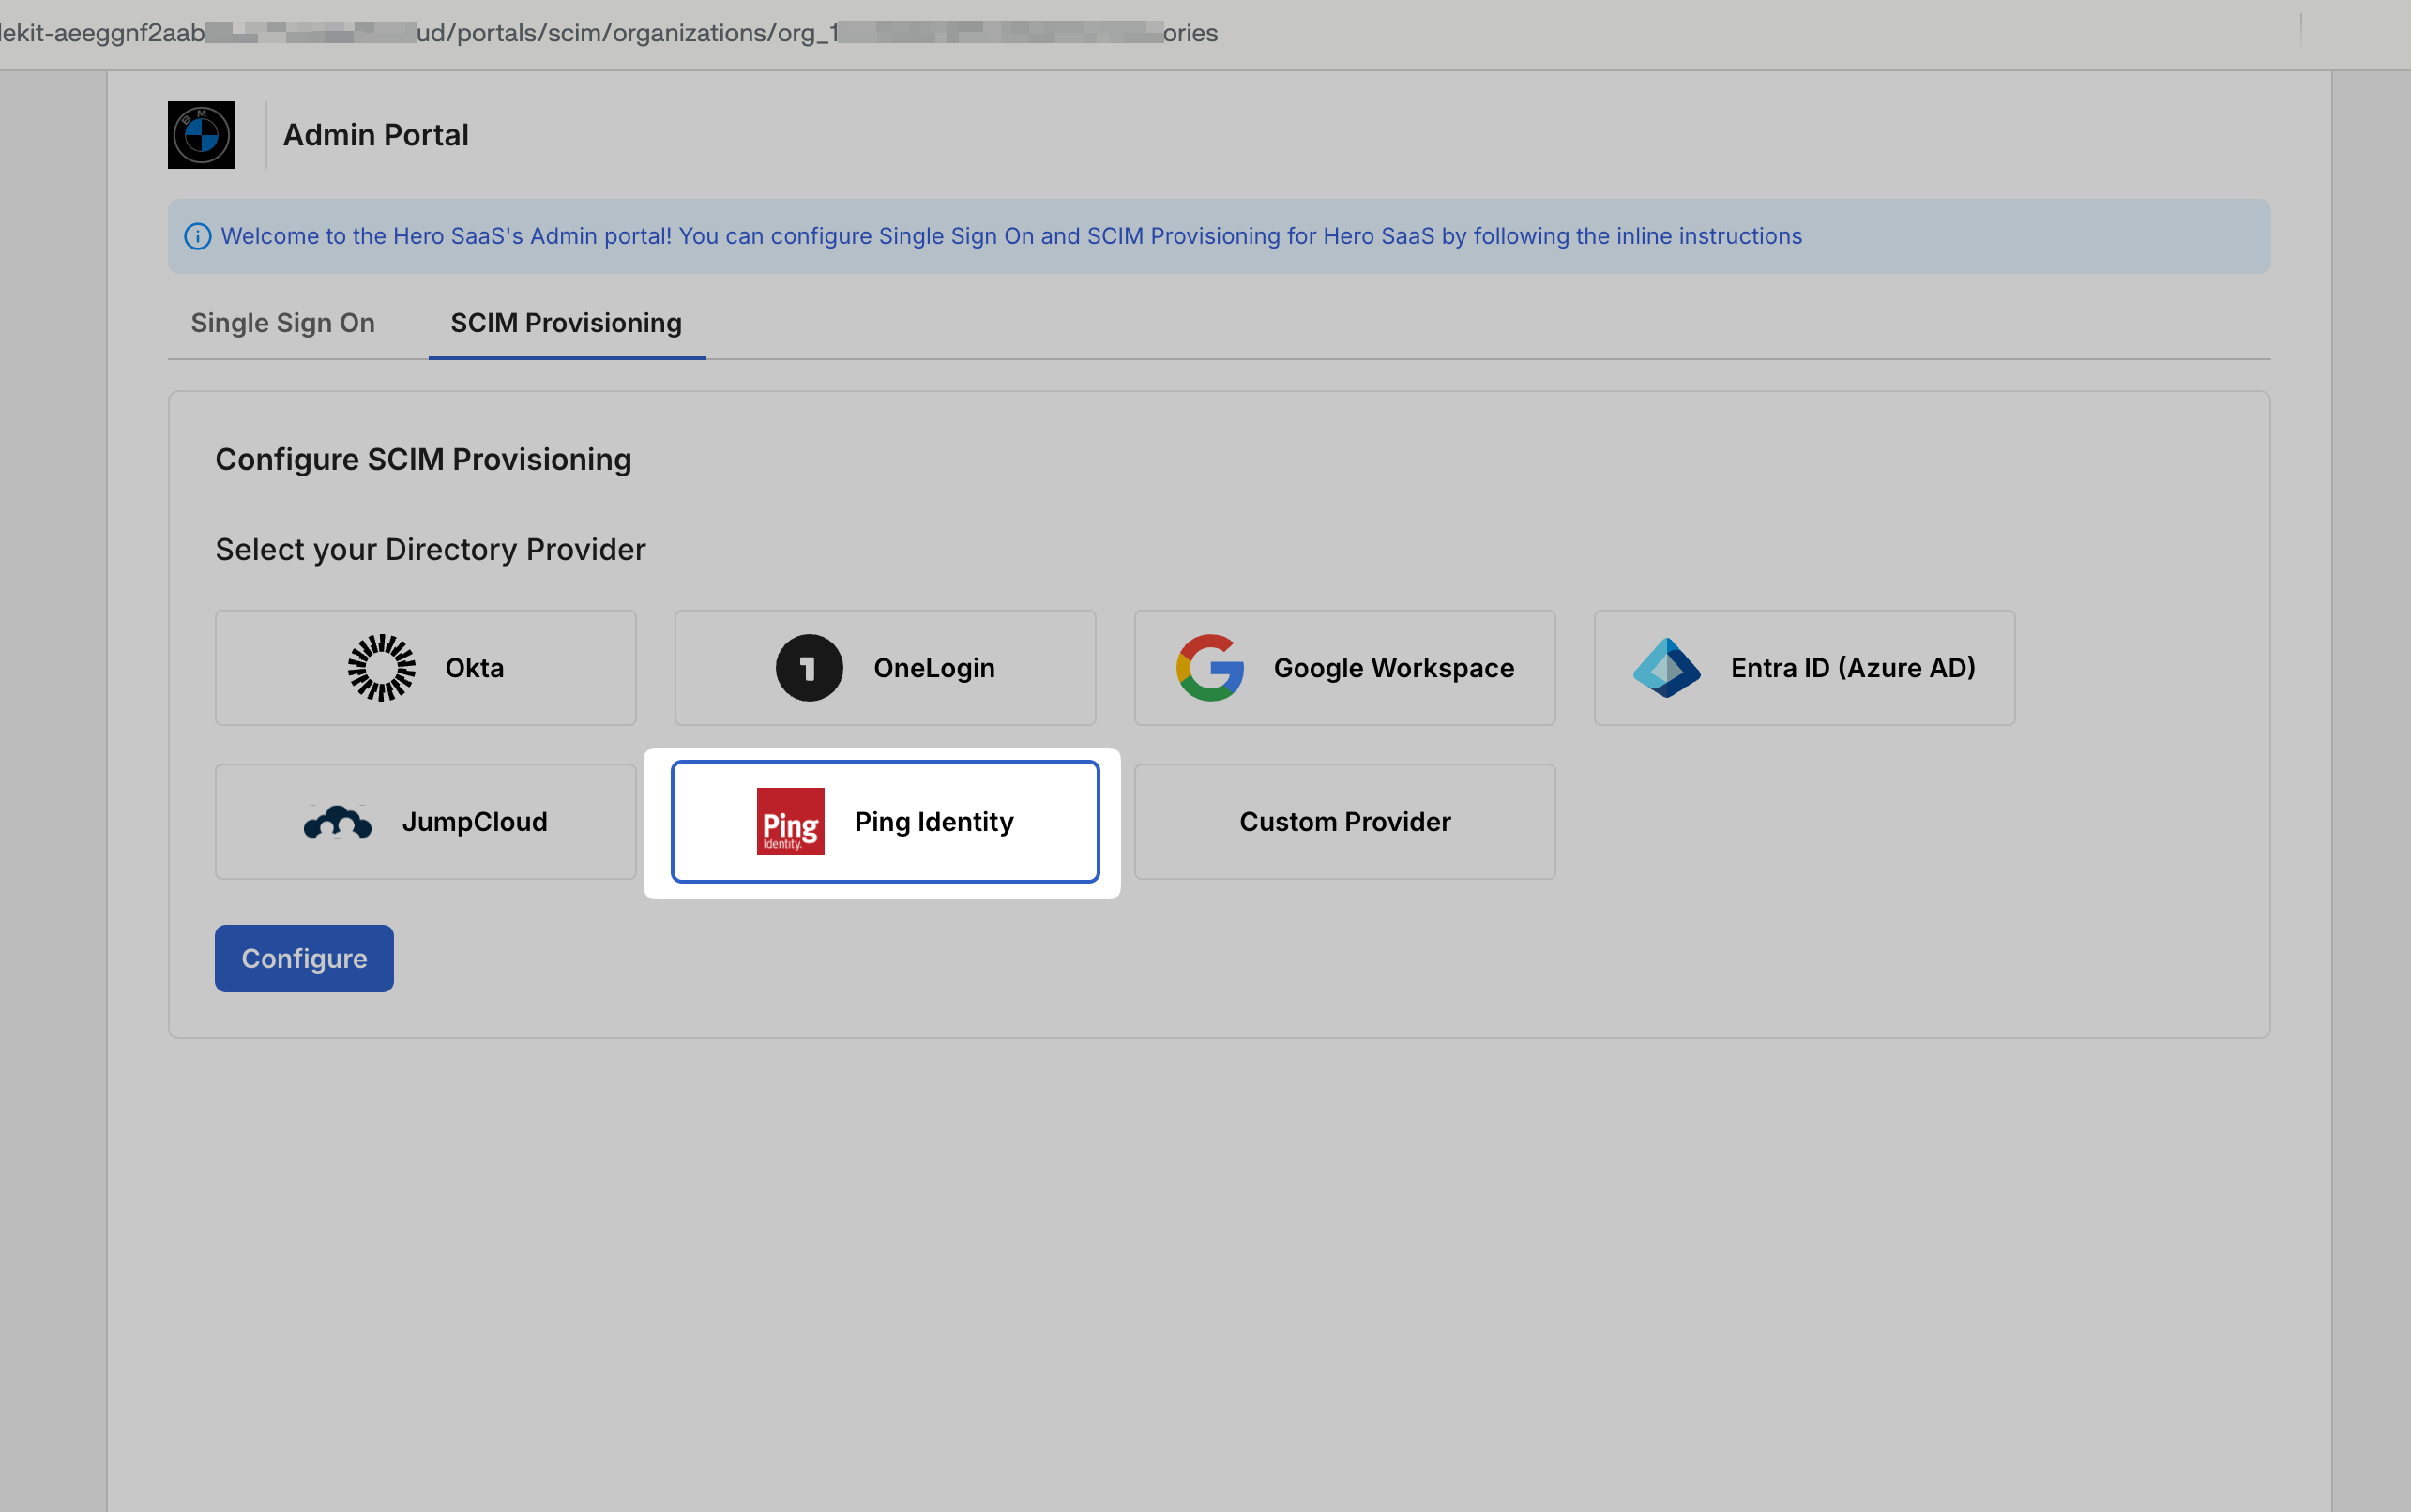
Generate SCIM credentials
Section titled “Generate SCIM credentials”Open the Admin Portal from the application being onboarded and navigate to the SCIM Provisioning tab. Choose PingIdentity as your Directory Provider and click Configure.
The Admin Portal automatically generates and displays an Endpoint URL and a Bearer token. Copy these values as you will need them to configure PingIdentity.
-
Navigate to PingIdentity Provisioning
Section titled “Navigate to PingIdentity Provisioning”Log in to your PingIdentity admin console (typically at
console.pingone.com). Navigate to the Integrations dropdown in the main menu and select Provisioning.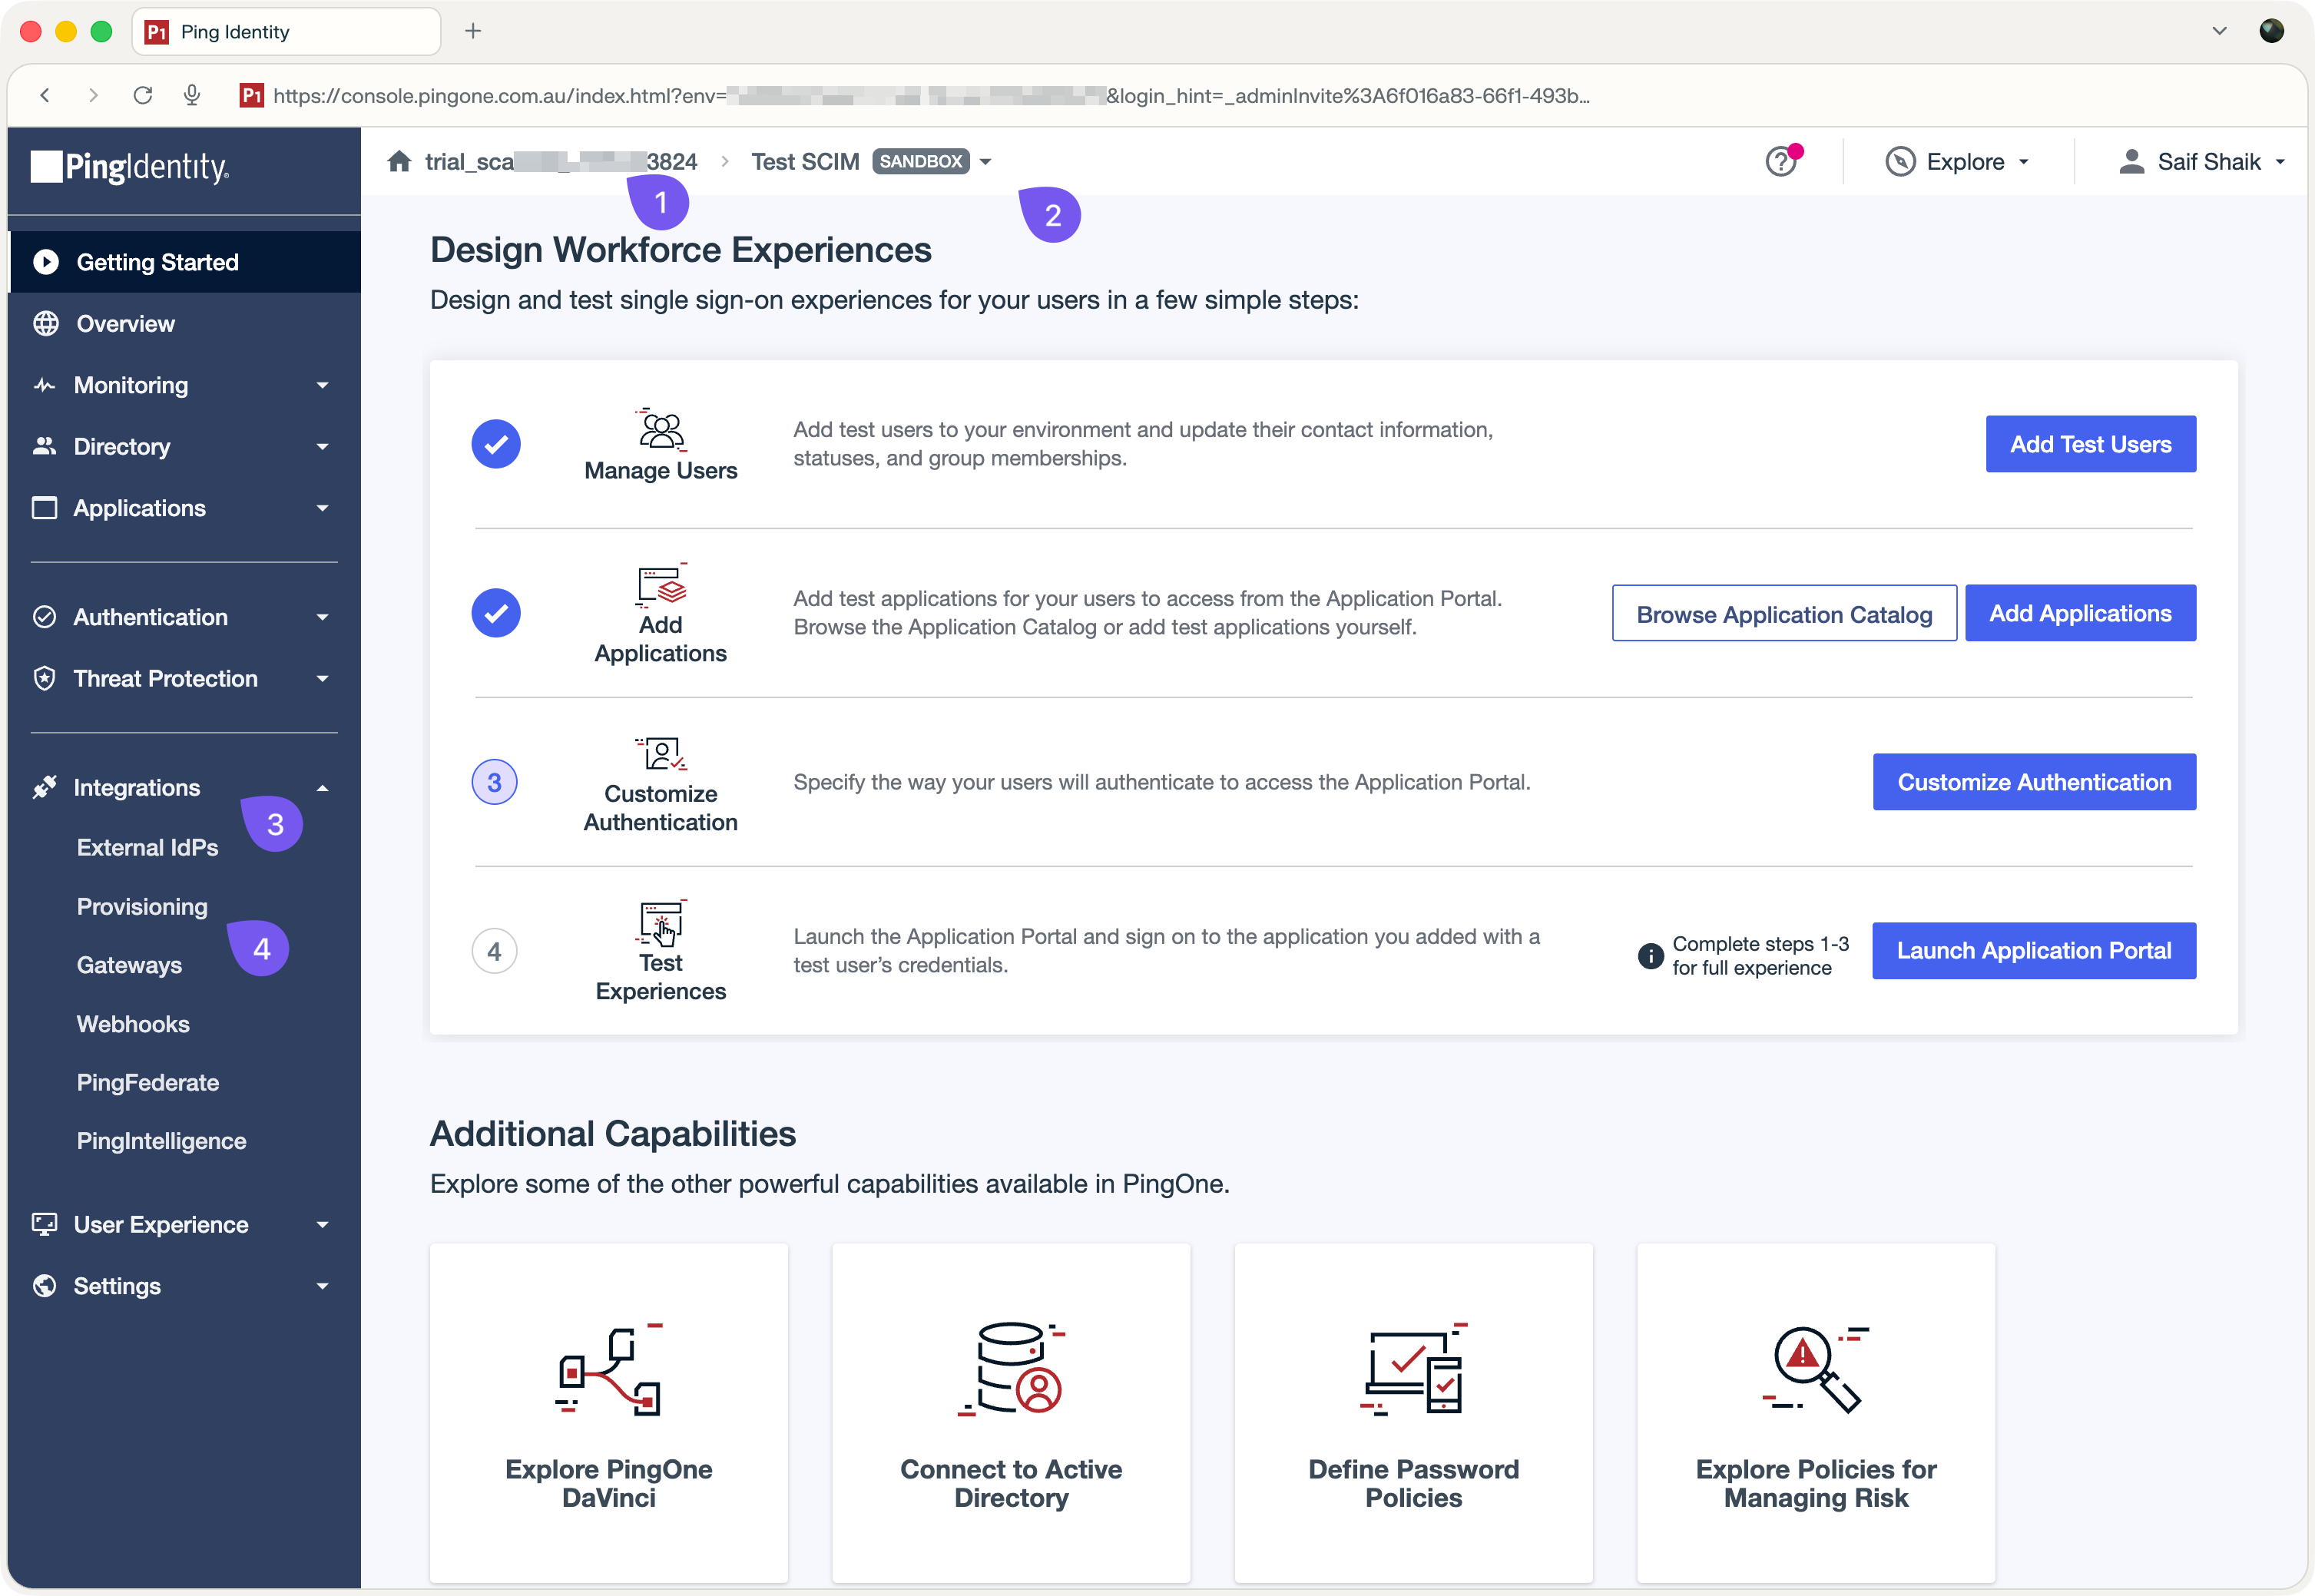
-
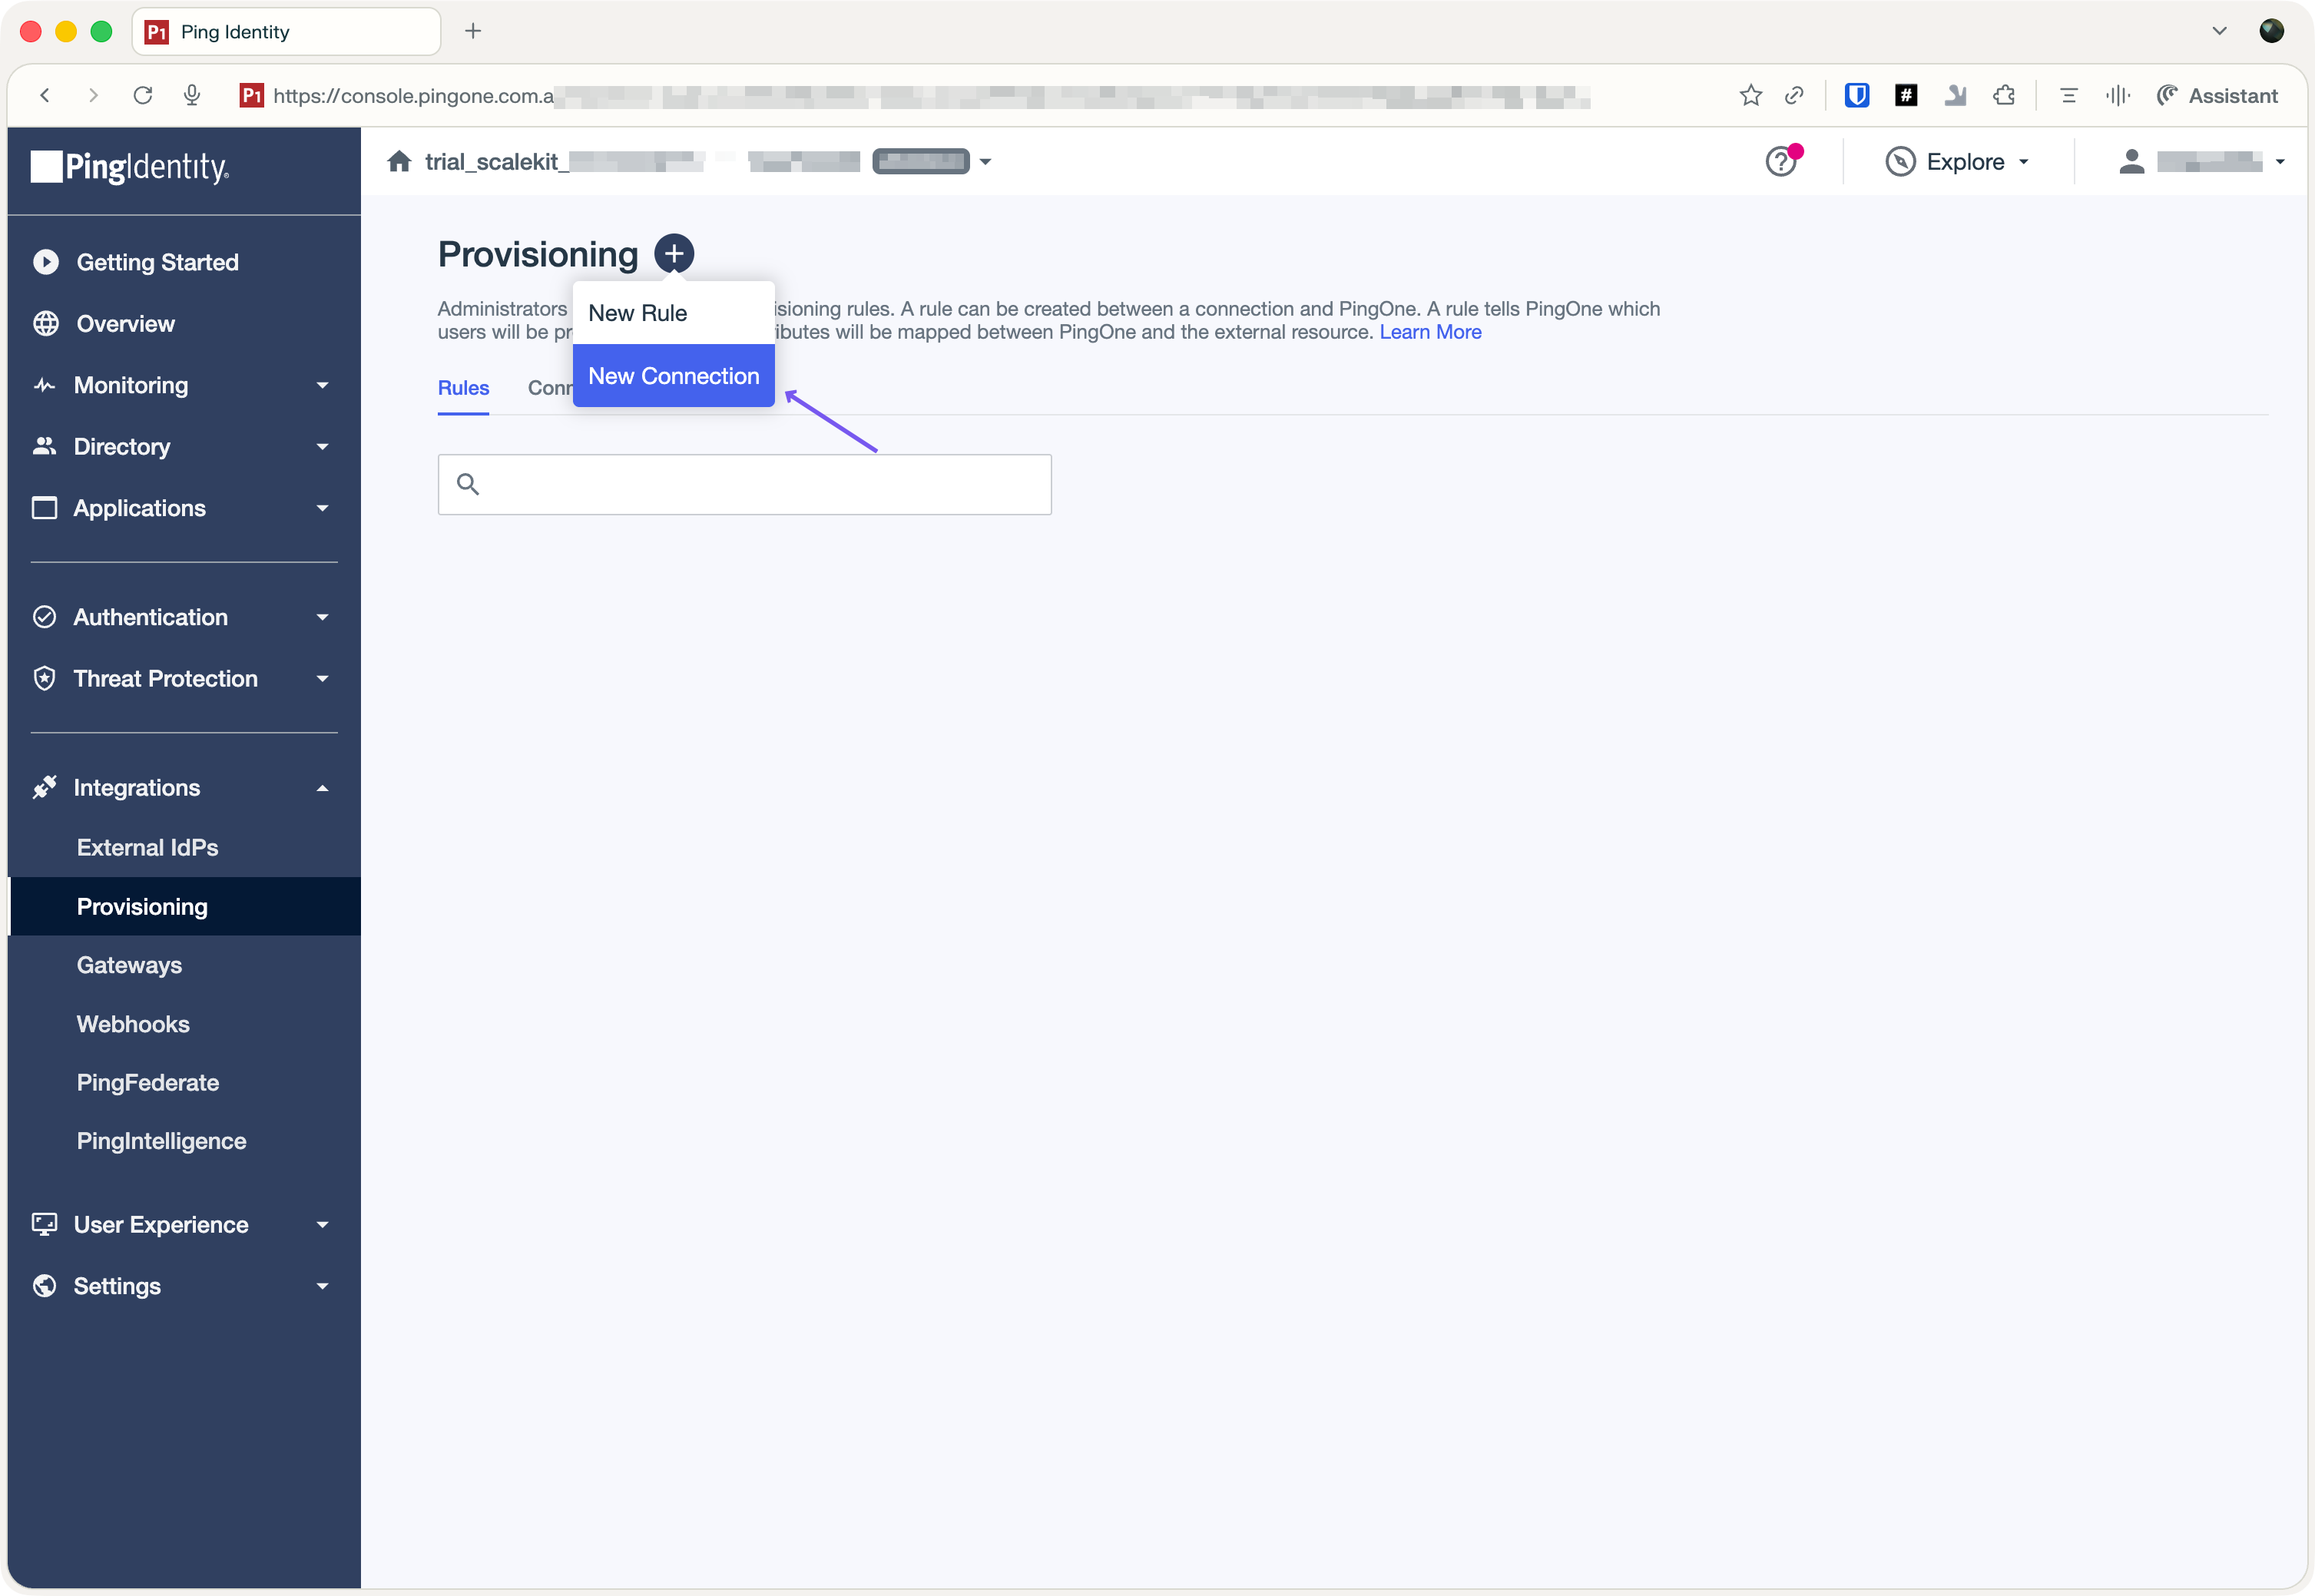
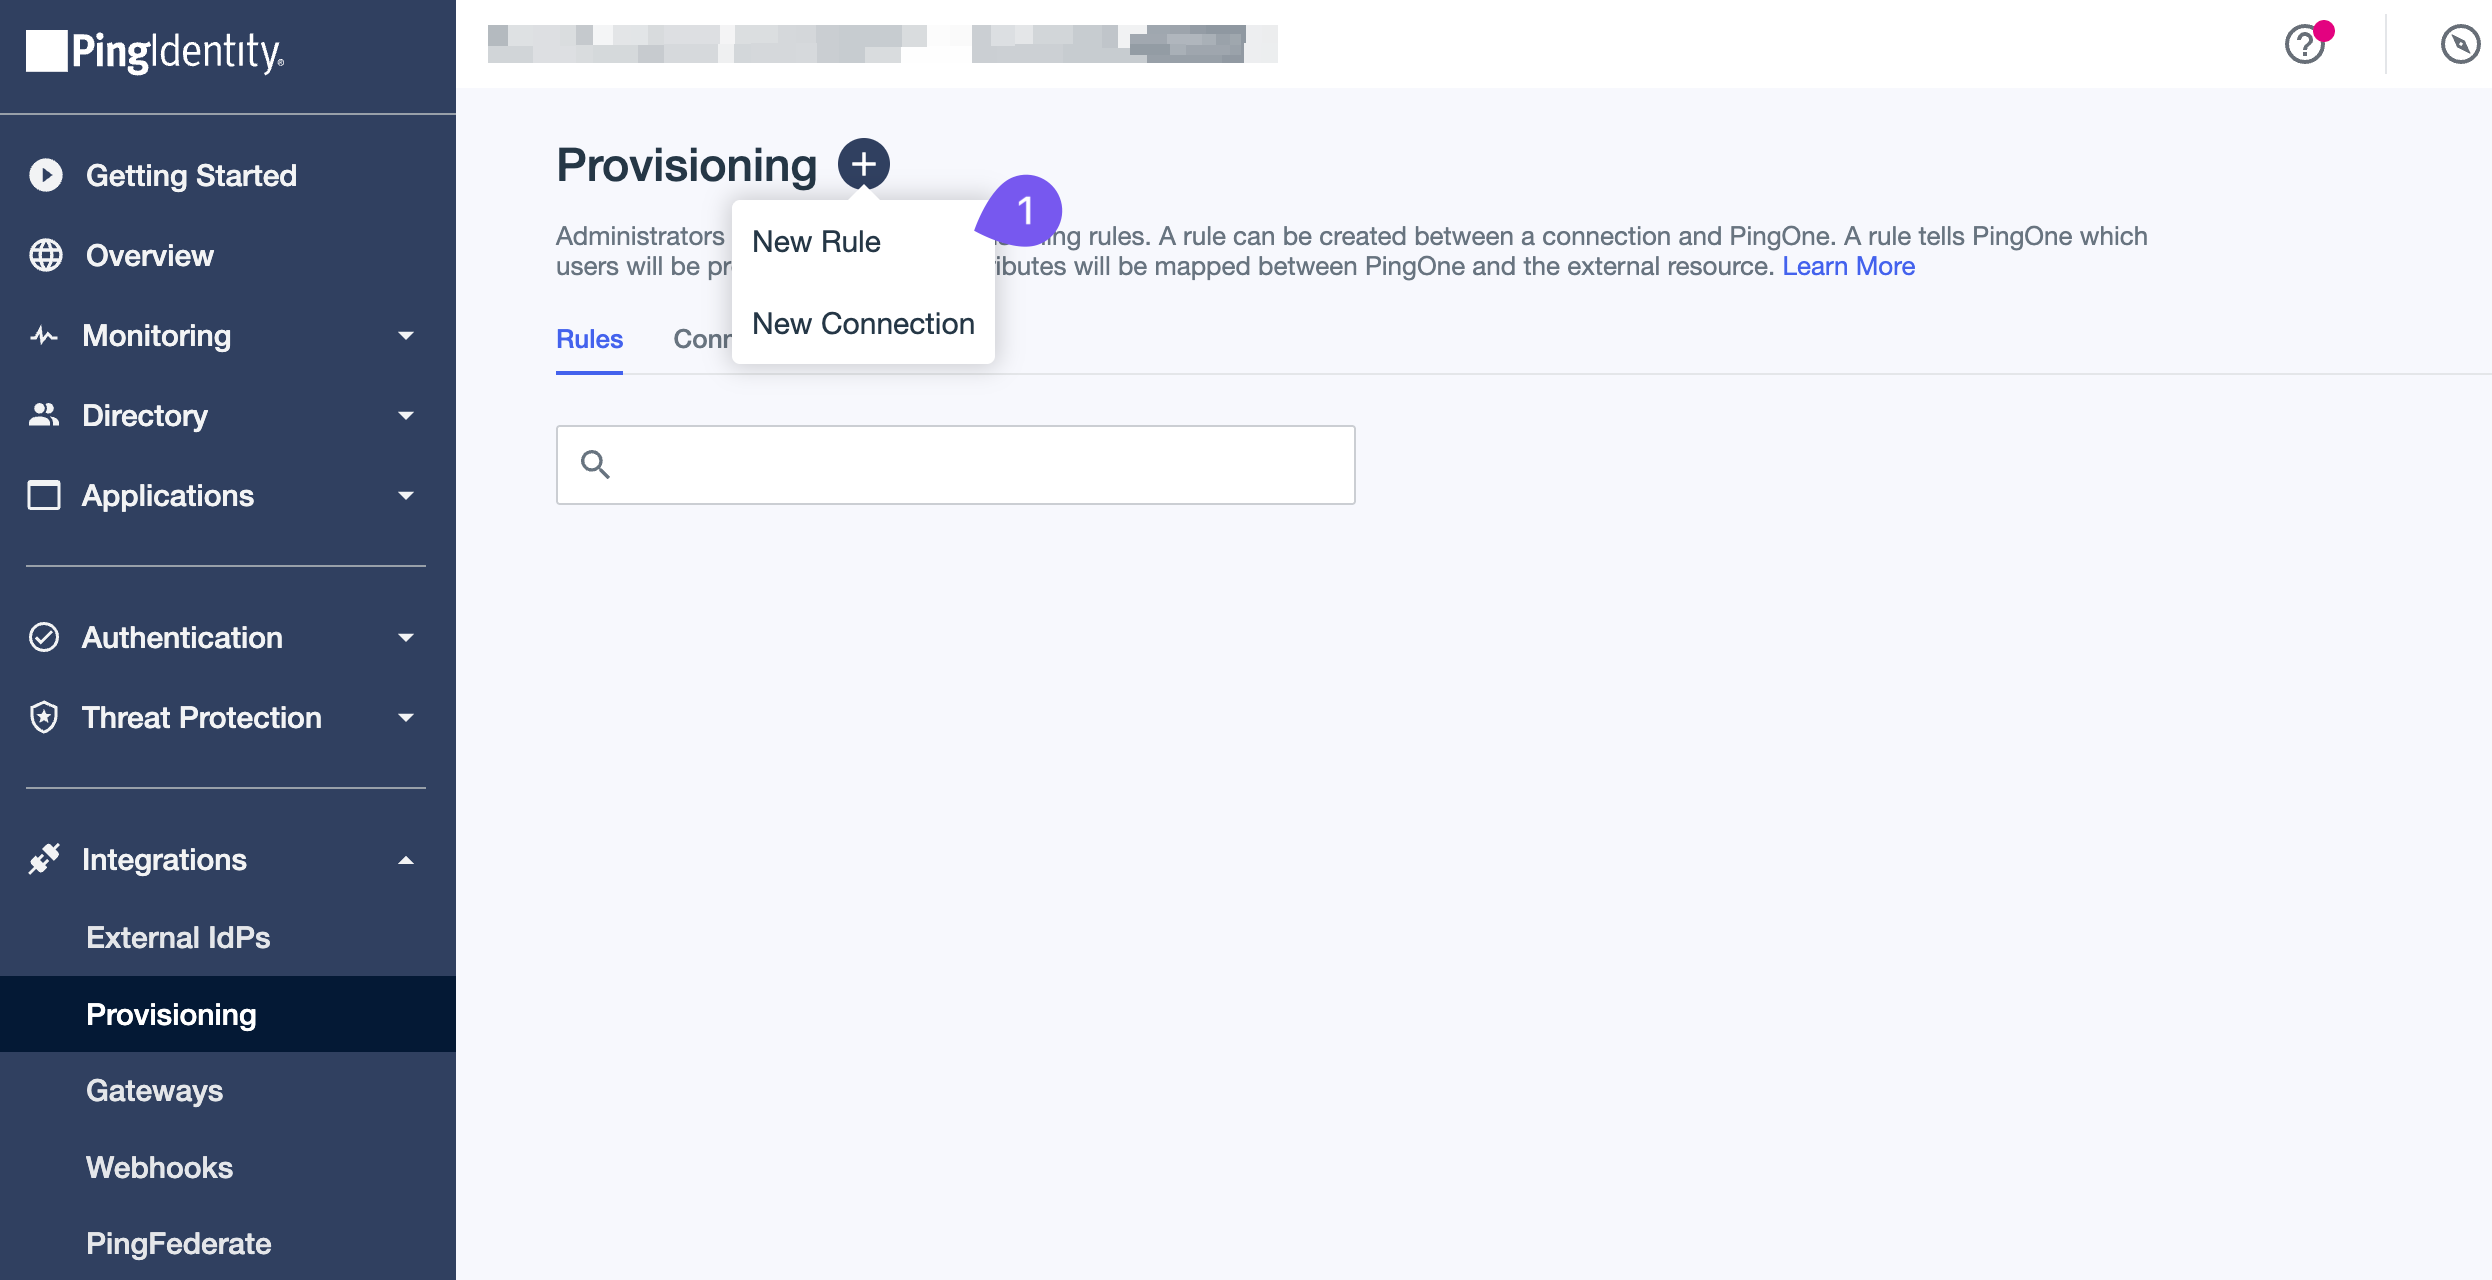
Create a new connection
Section titled “Create a new connection”Click the + (plus) icon at the top of the dashboard and select New Connection.
-
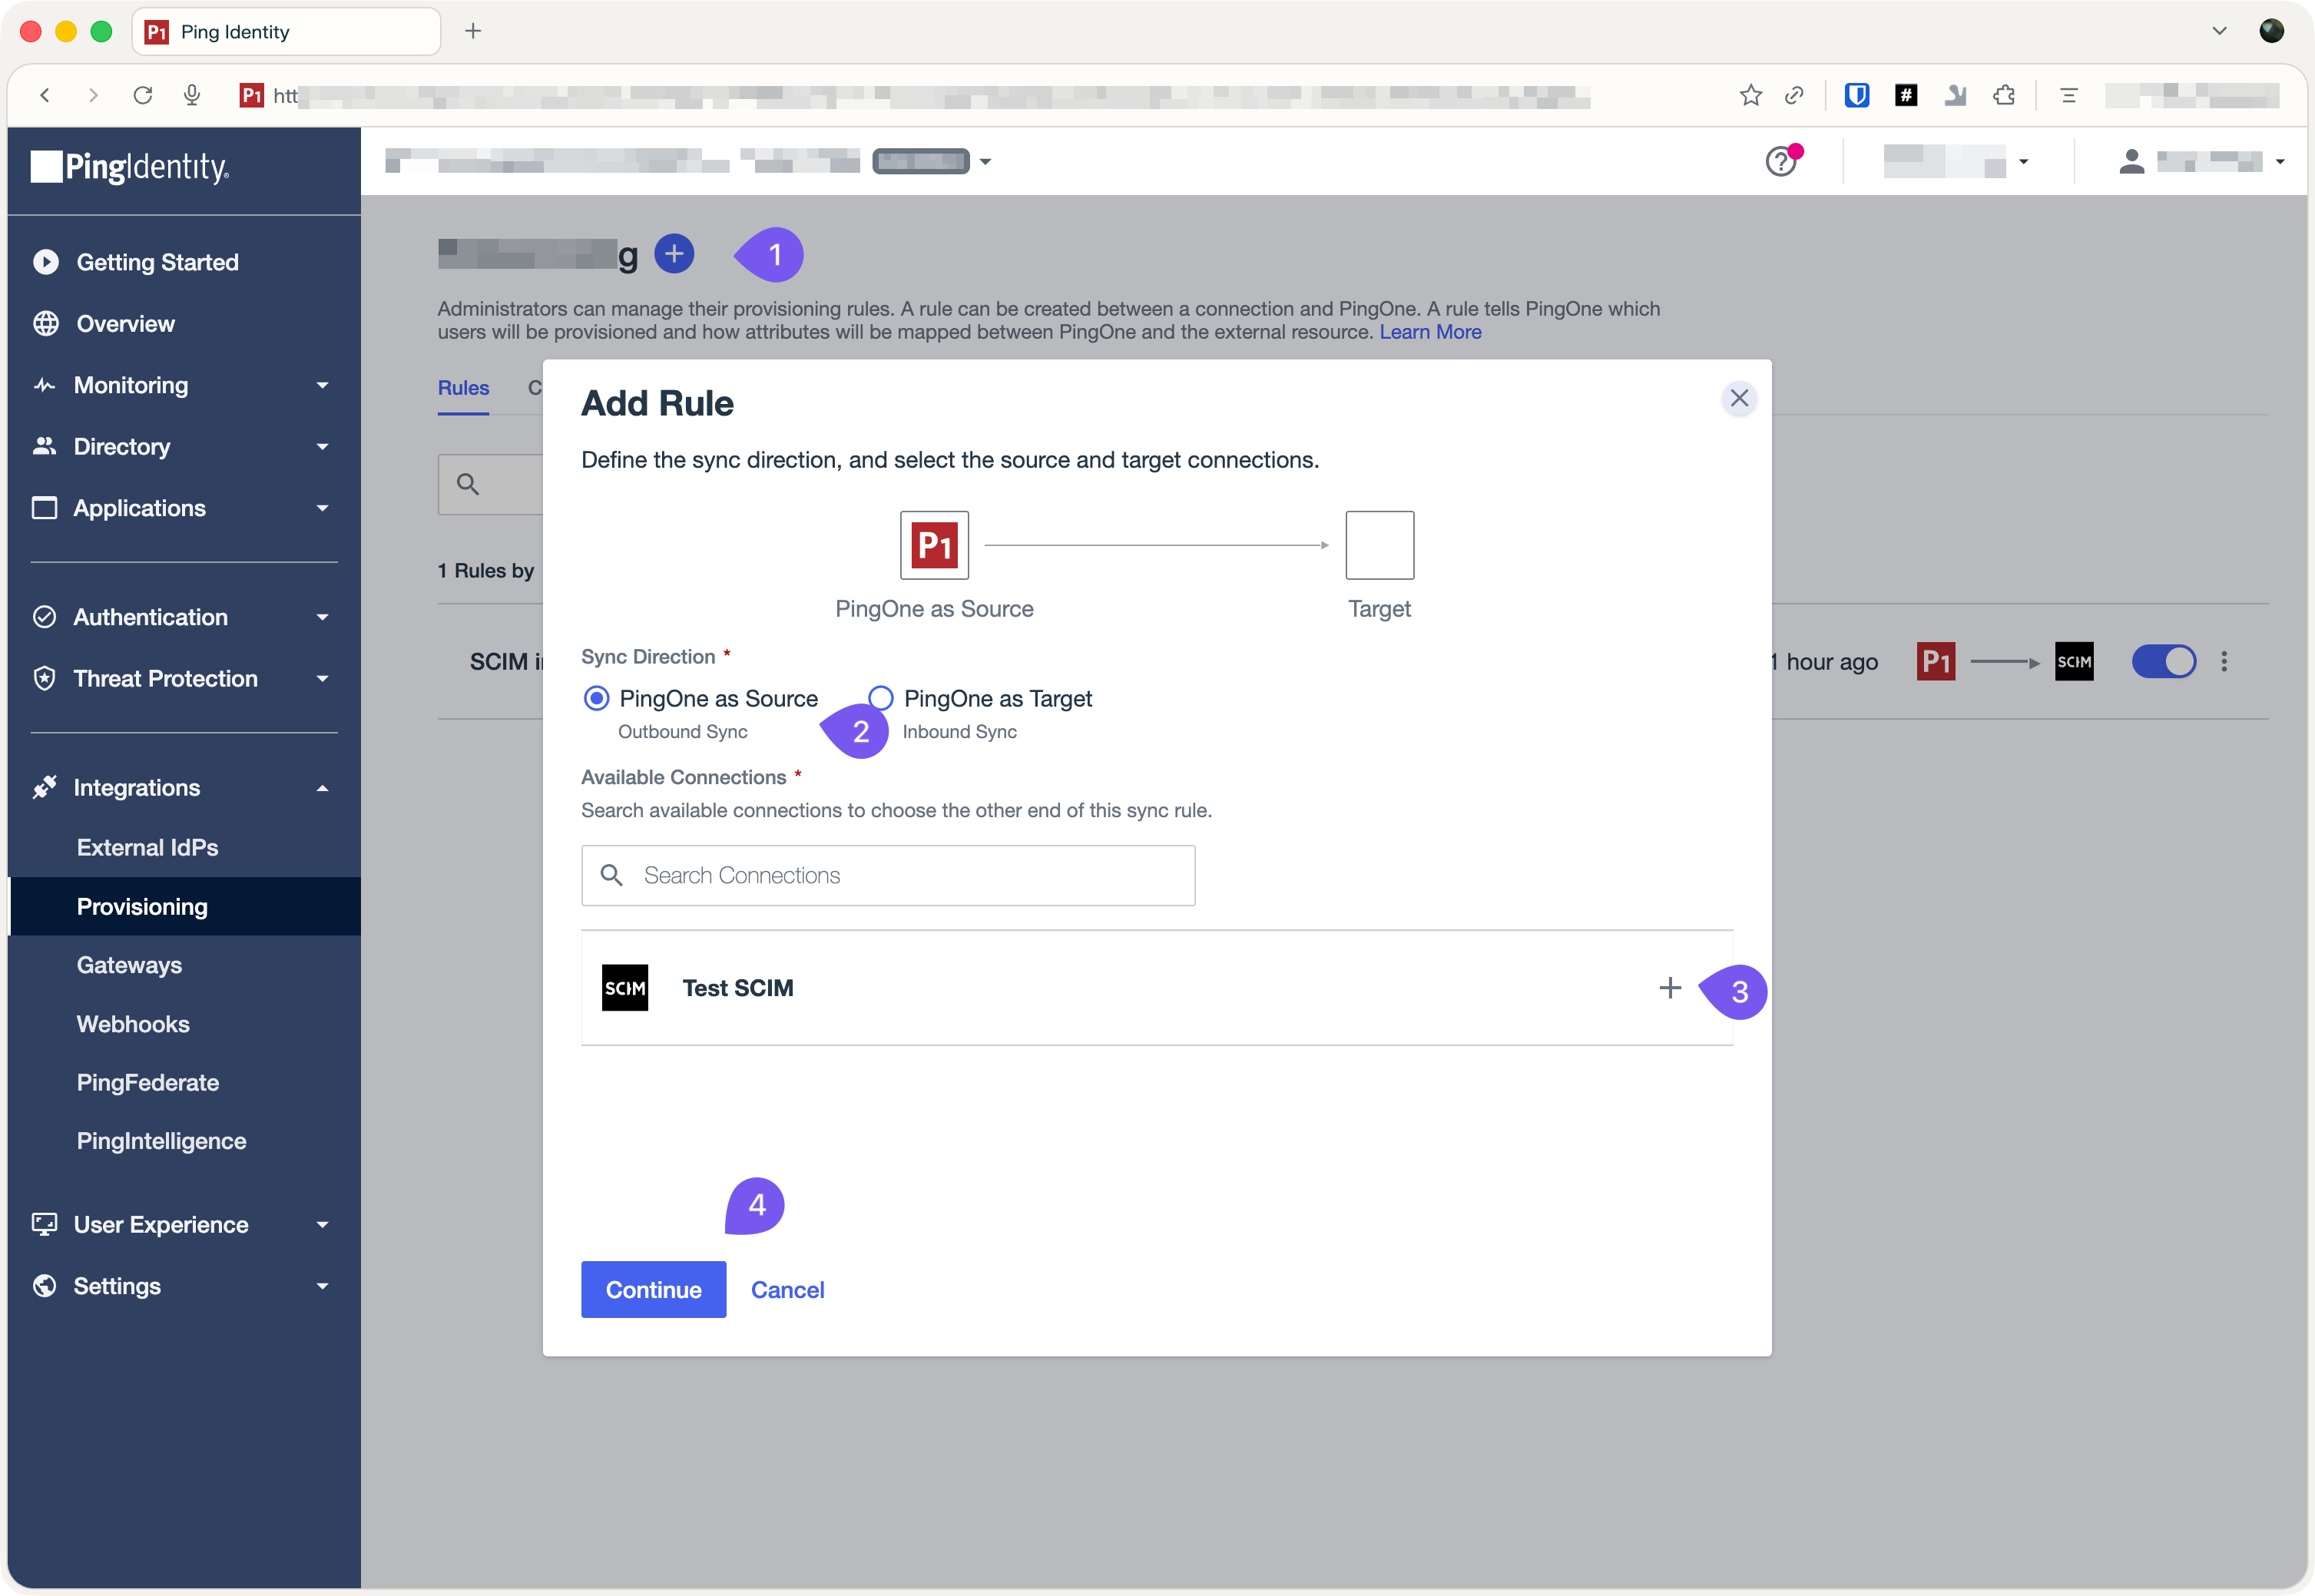
Select SCIM Outbound connector
Section titled “Select SCIM Outbound connector”In the modal that appears:
- Select Identity Store: Click Select to choose an identity store.
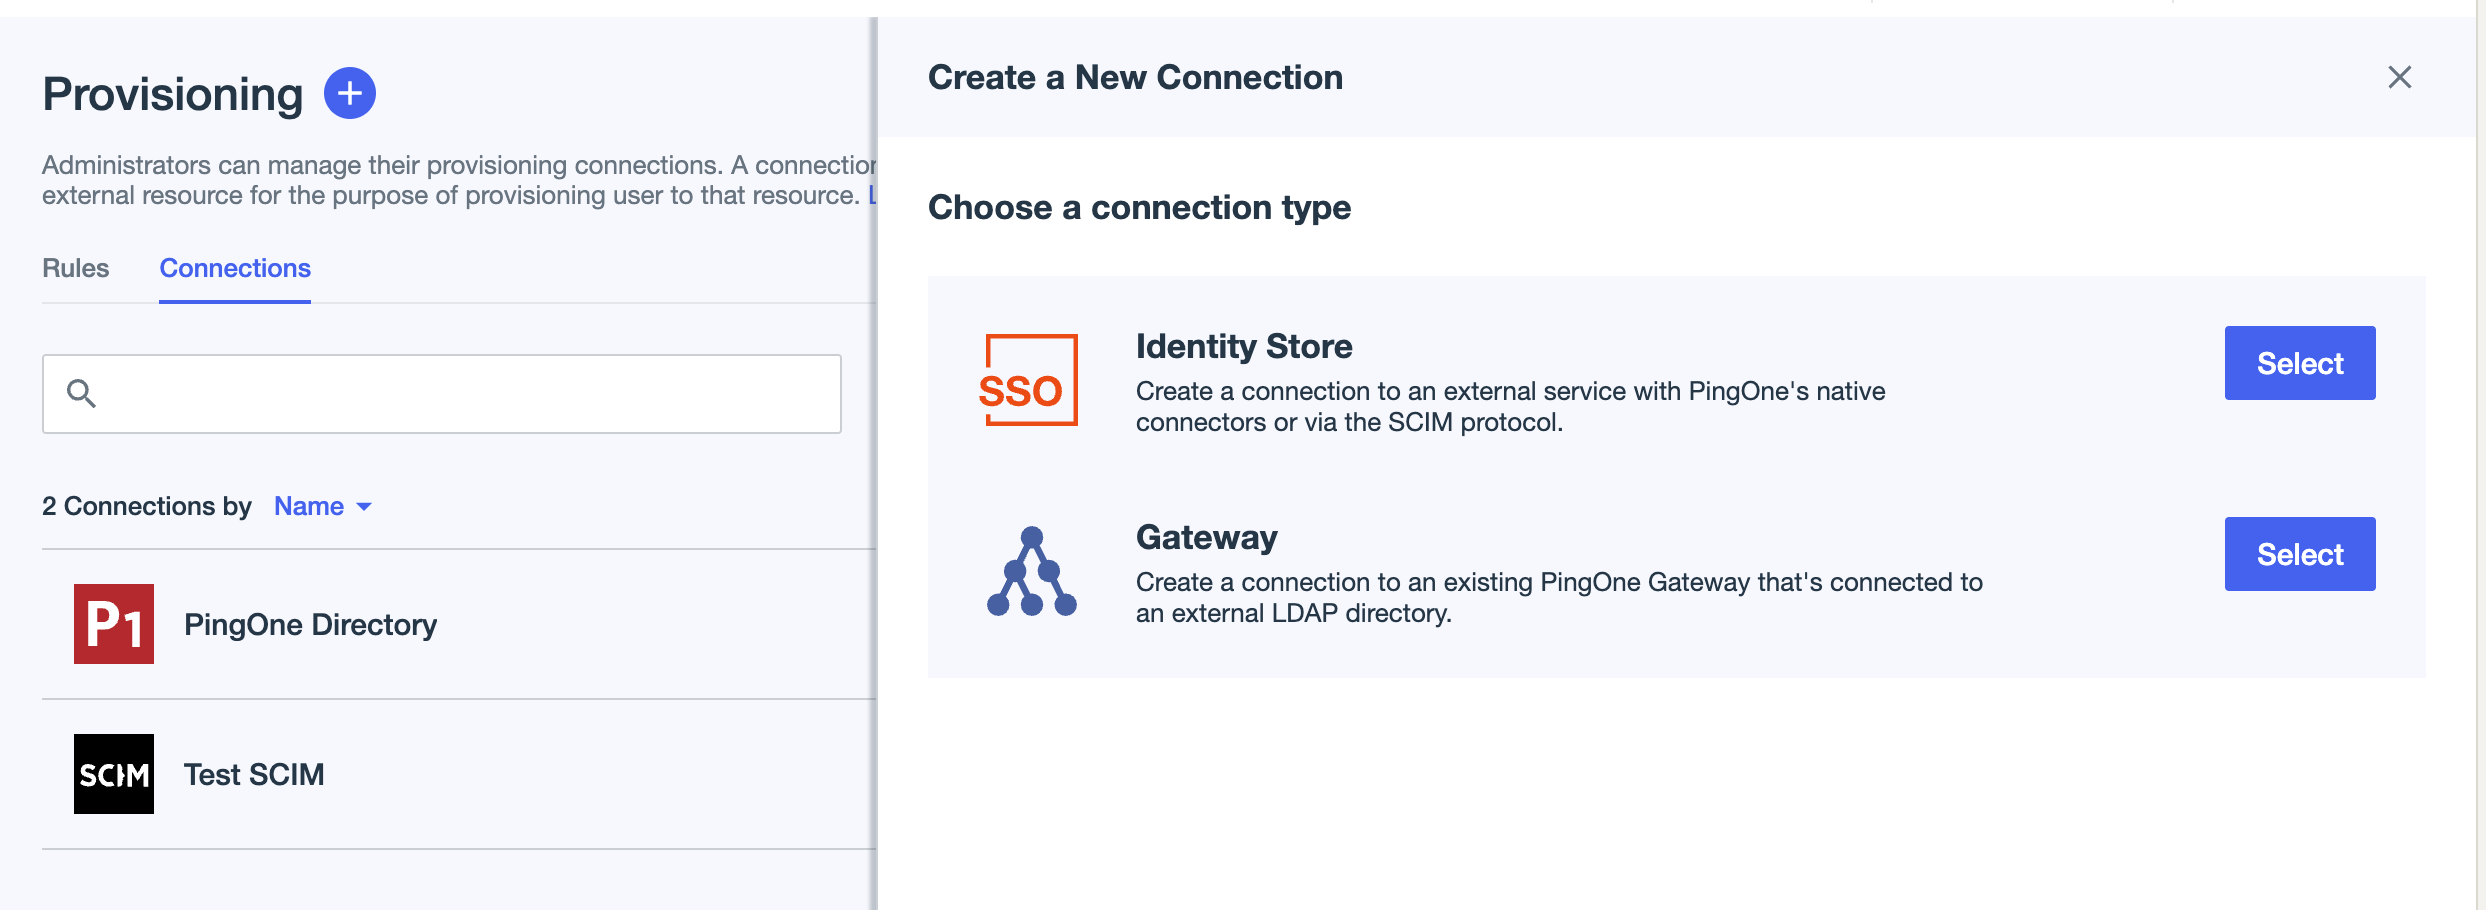
- Choose SCIM Outbound: From the catalog, select SCIM Outbound.
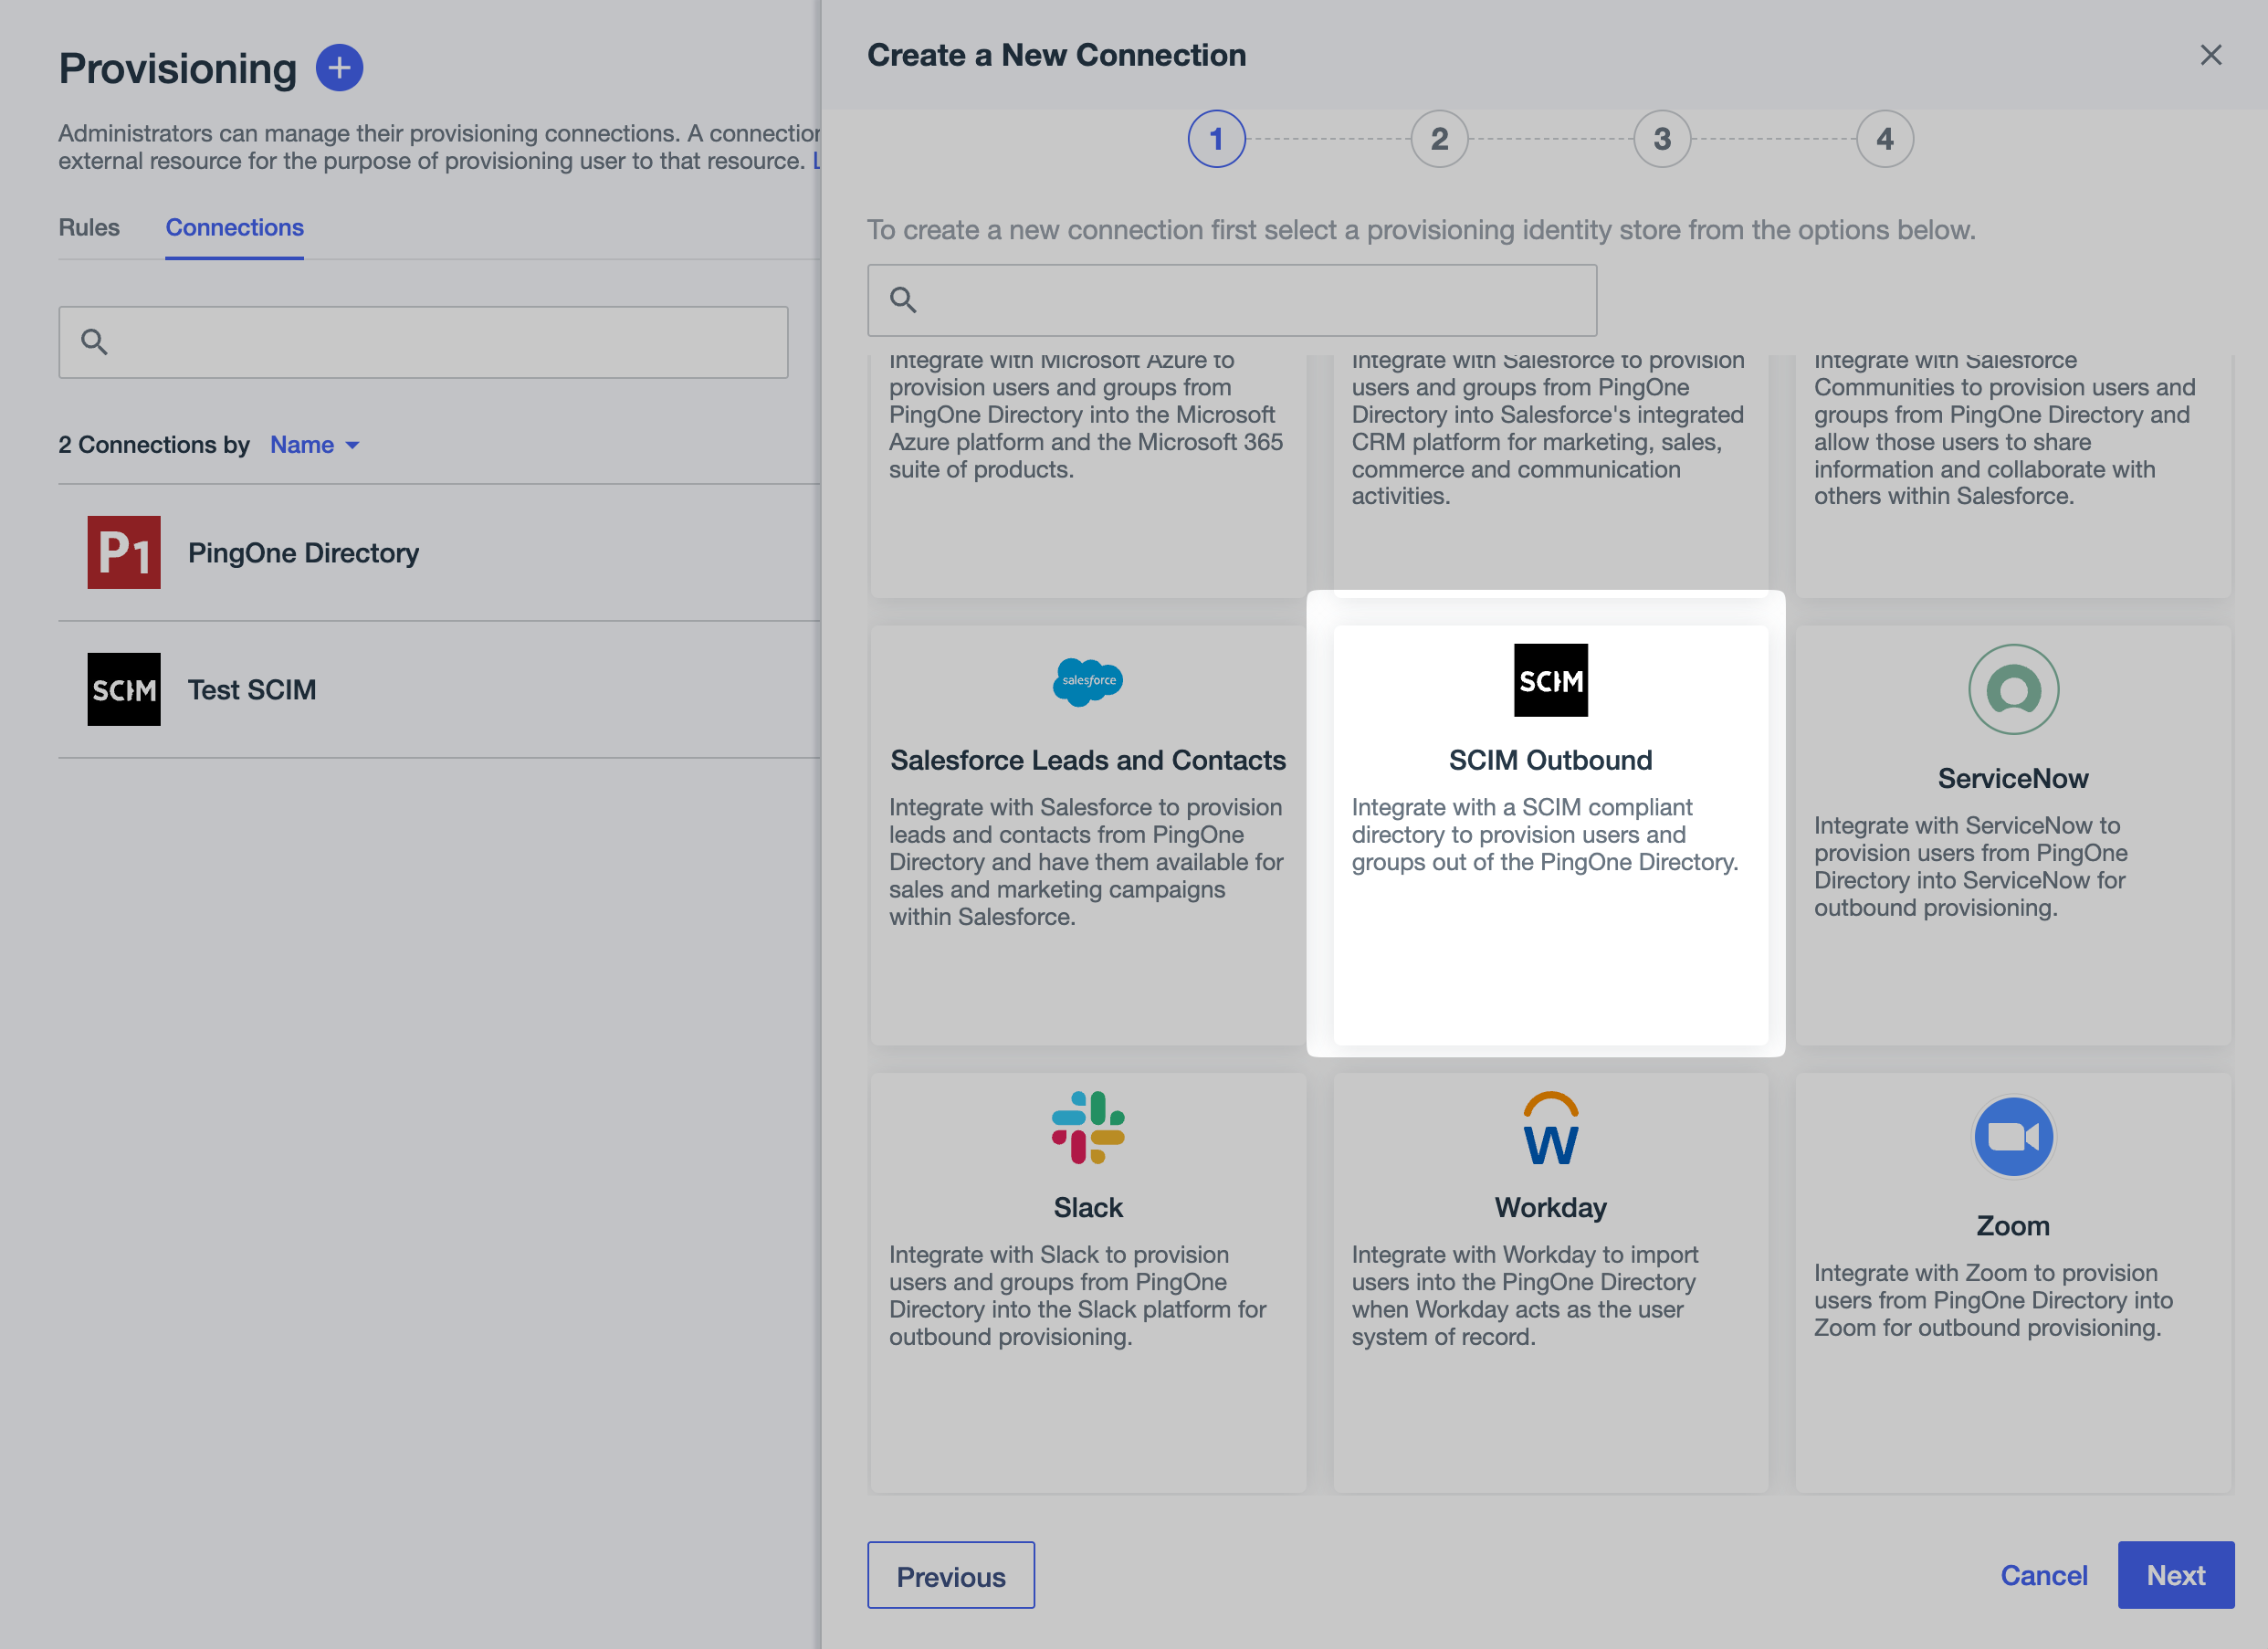
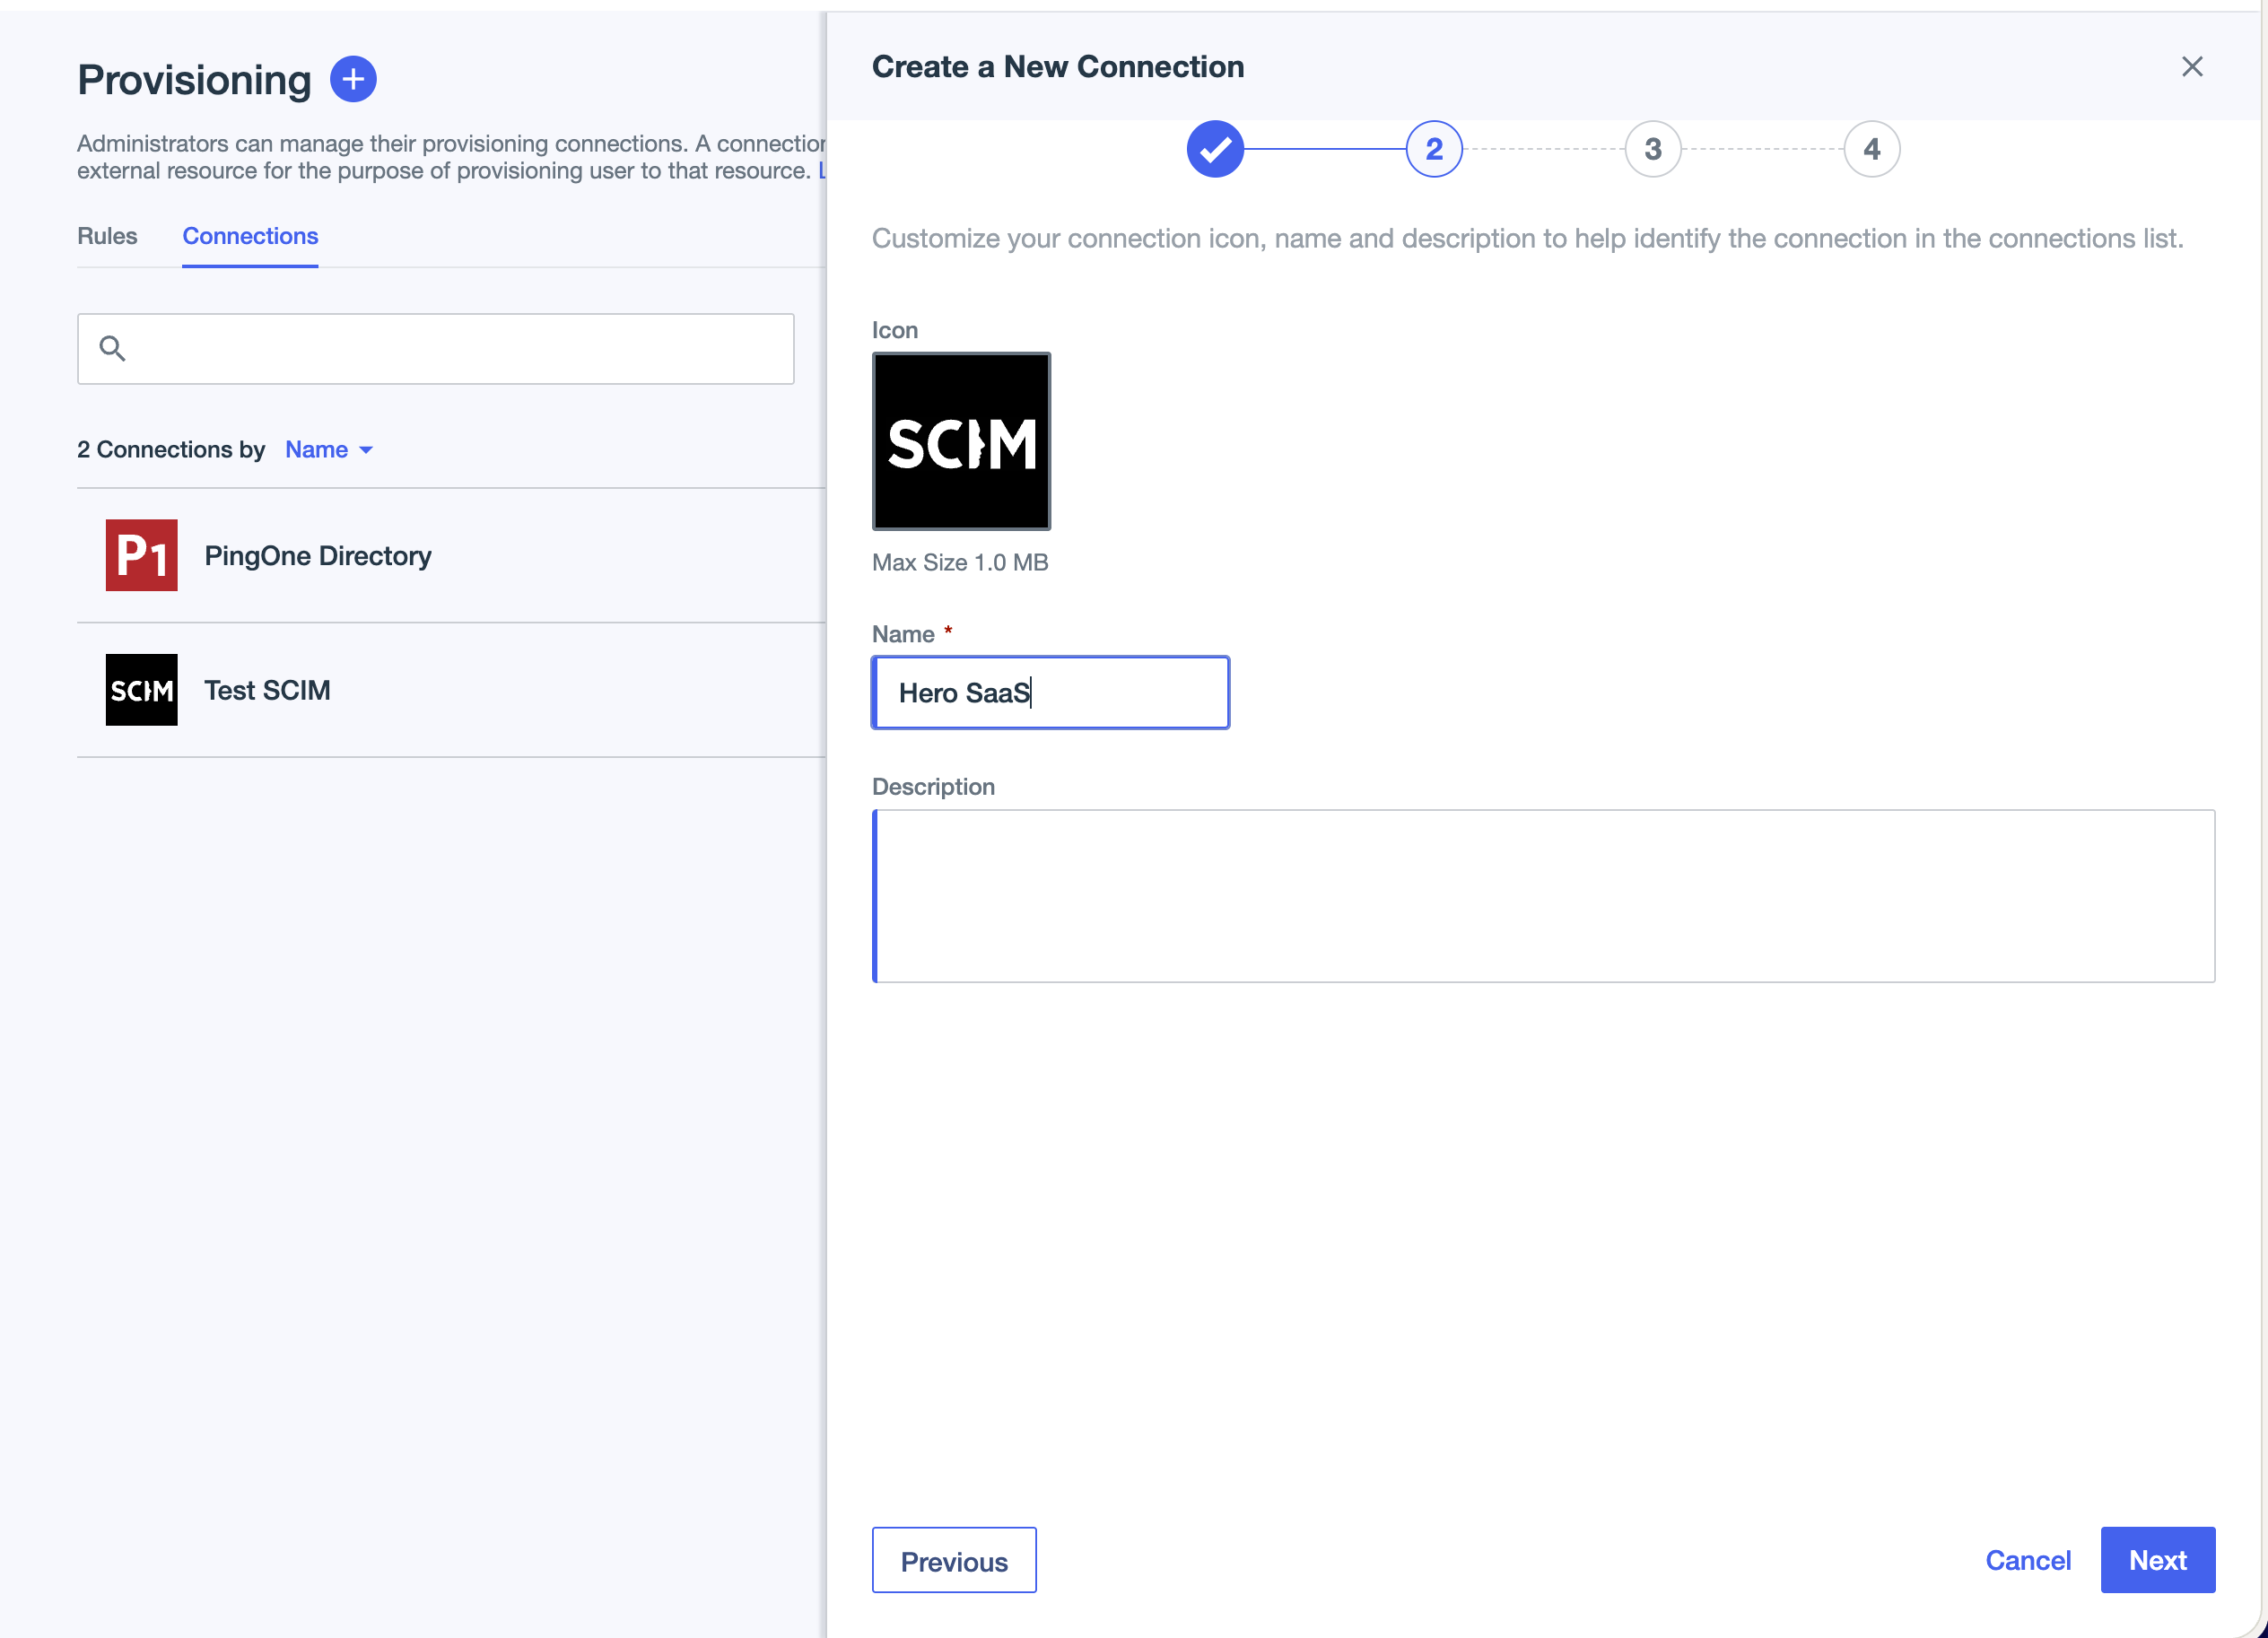
- Name and Description: Provide a name for the application you are onboarding (e.g., “Hero SaaS”) and add an optional description. Click Next.
- Select Identity Store: Click Select to choose an identity store.
-
Configure connection settings
Section titled “Configure connection settings”In the connection settings screen:
- SCIM Endpoint URL: Paste the Endpoint URL from the Admin Portal
- Authentication Method: Select OAuth 2 Bearer Token
- Bearer Token: Paste the Bearer Token from the Admin Portal
- Click Test Connection to verify the connection works correctly
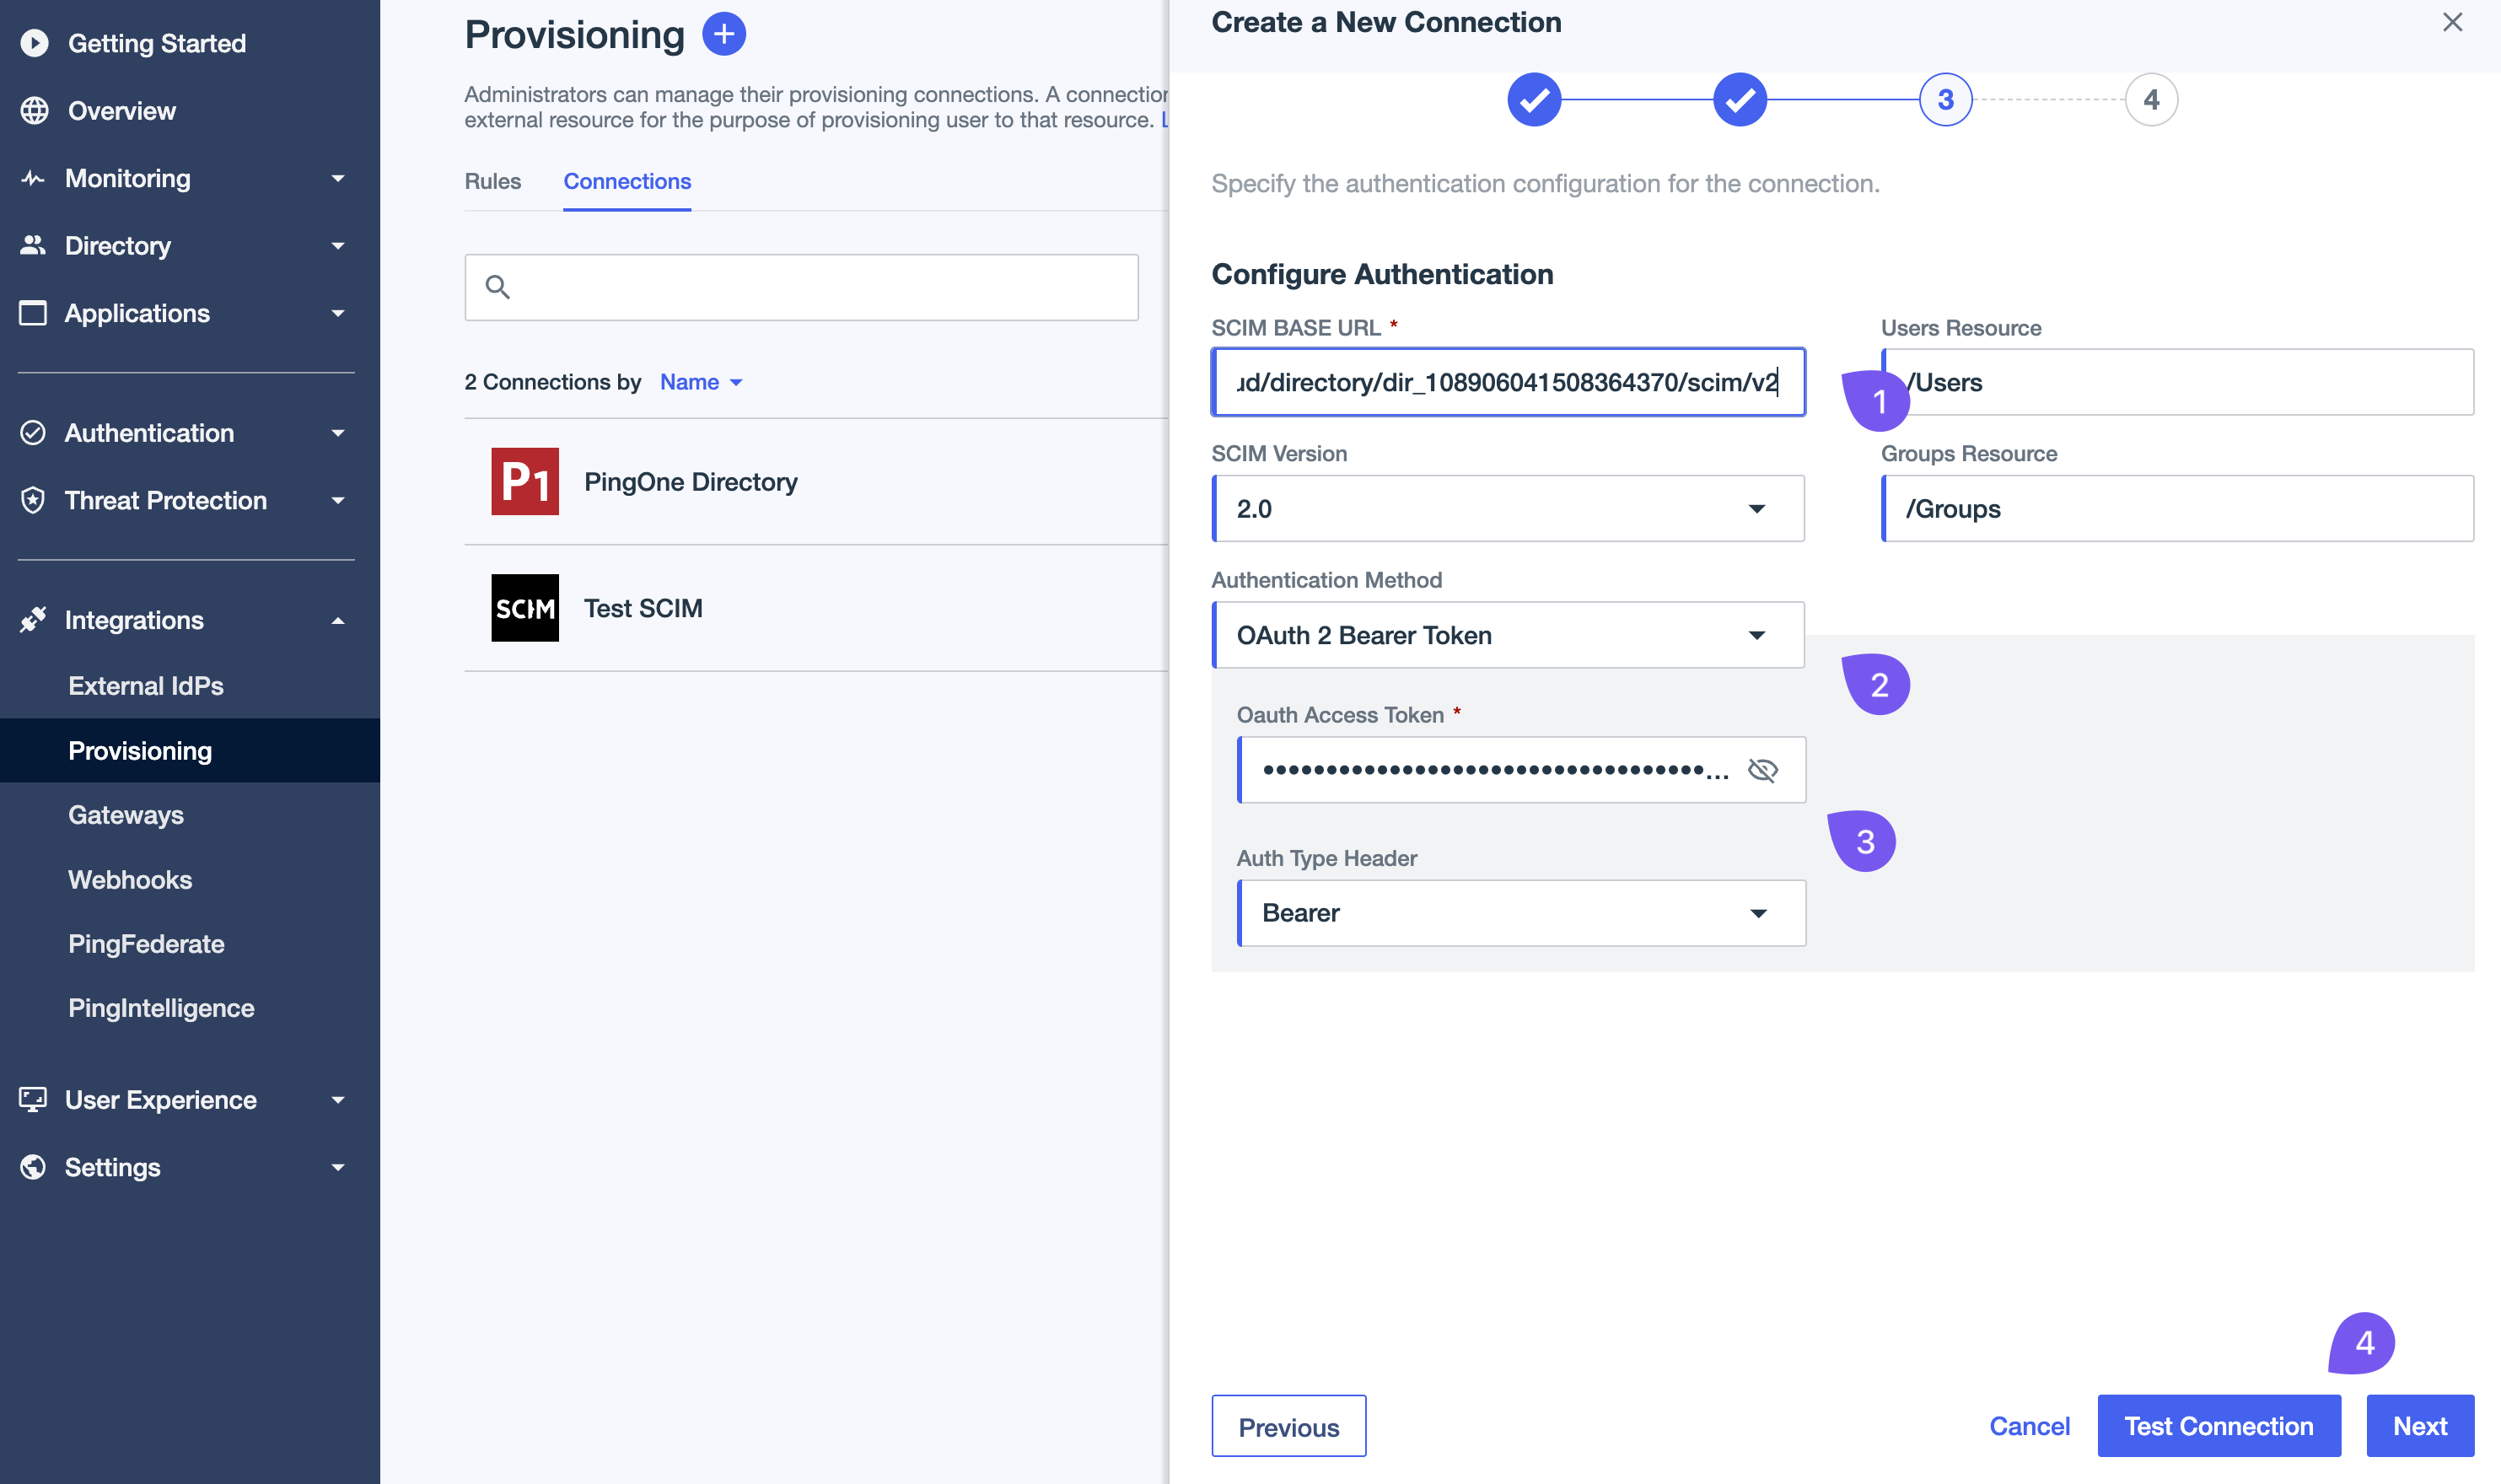
After successful testing, click Next to proceed.
-
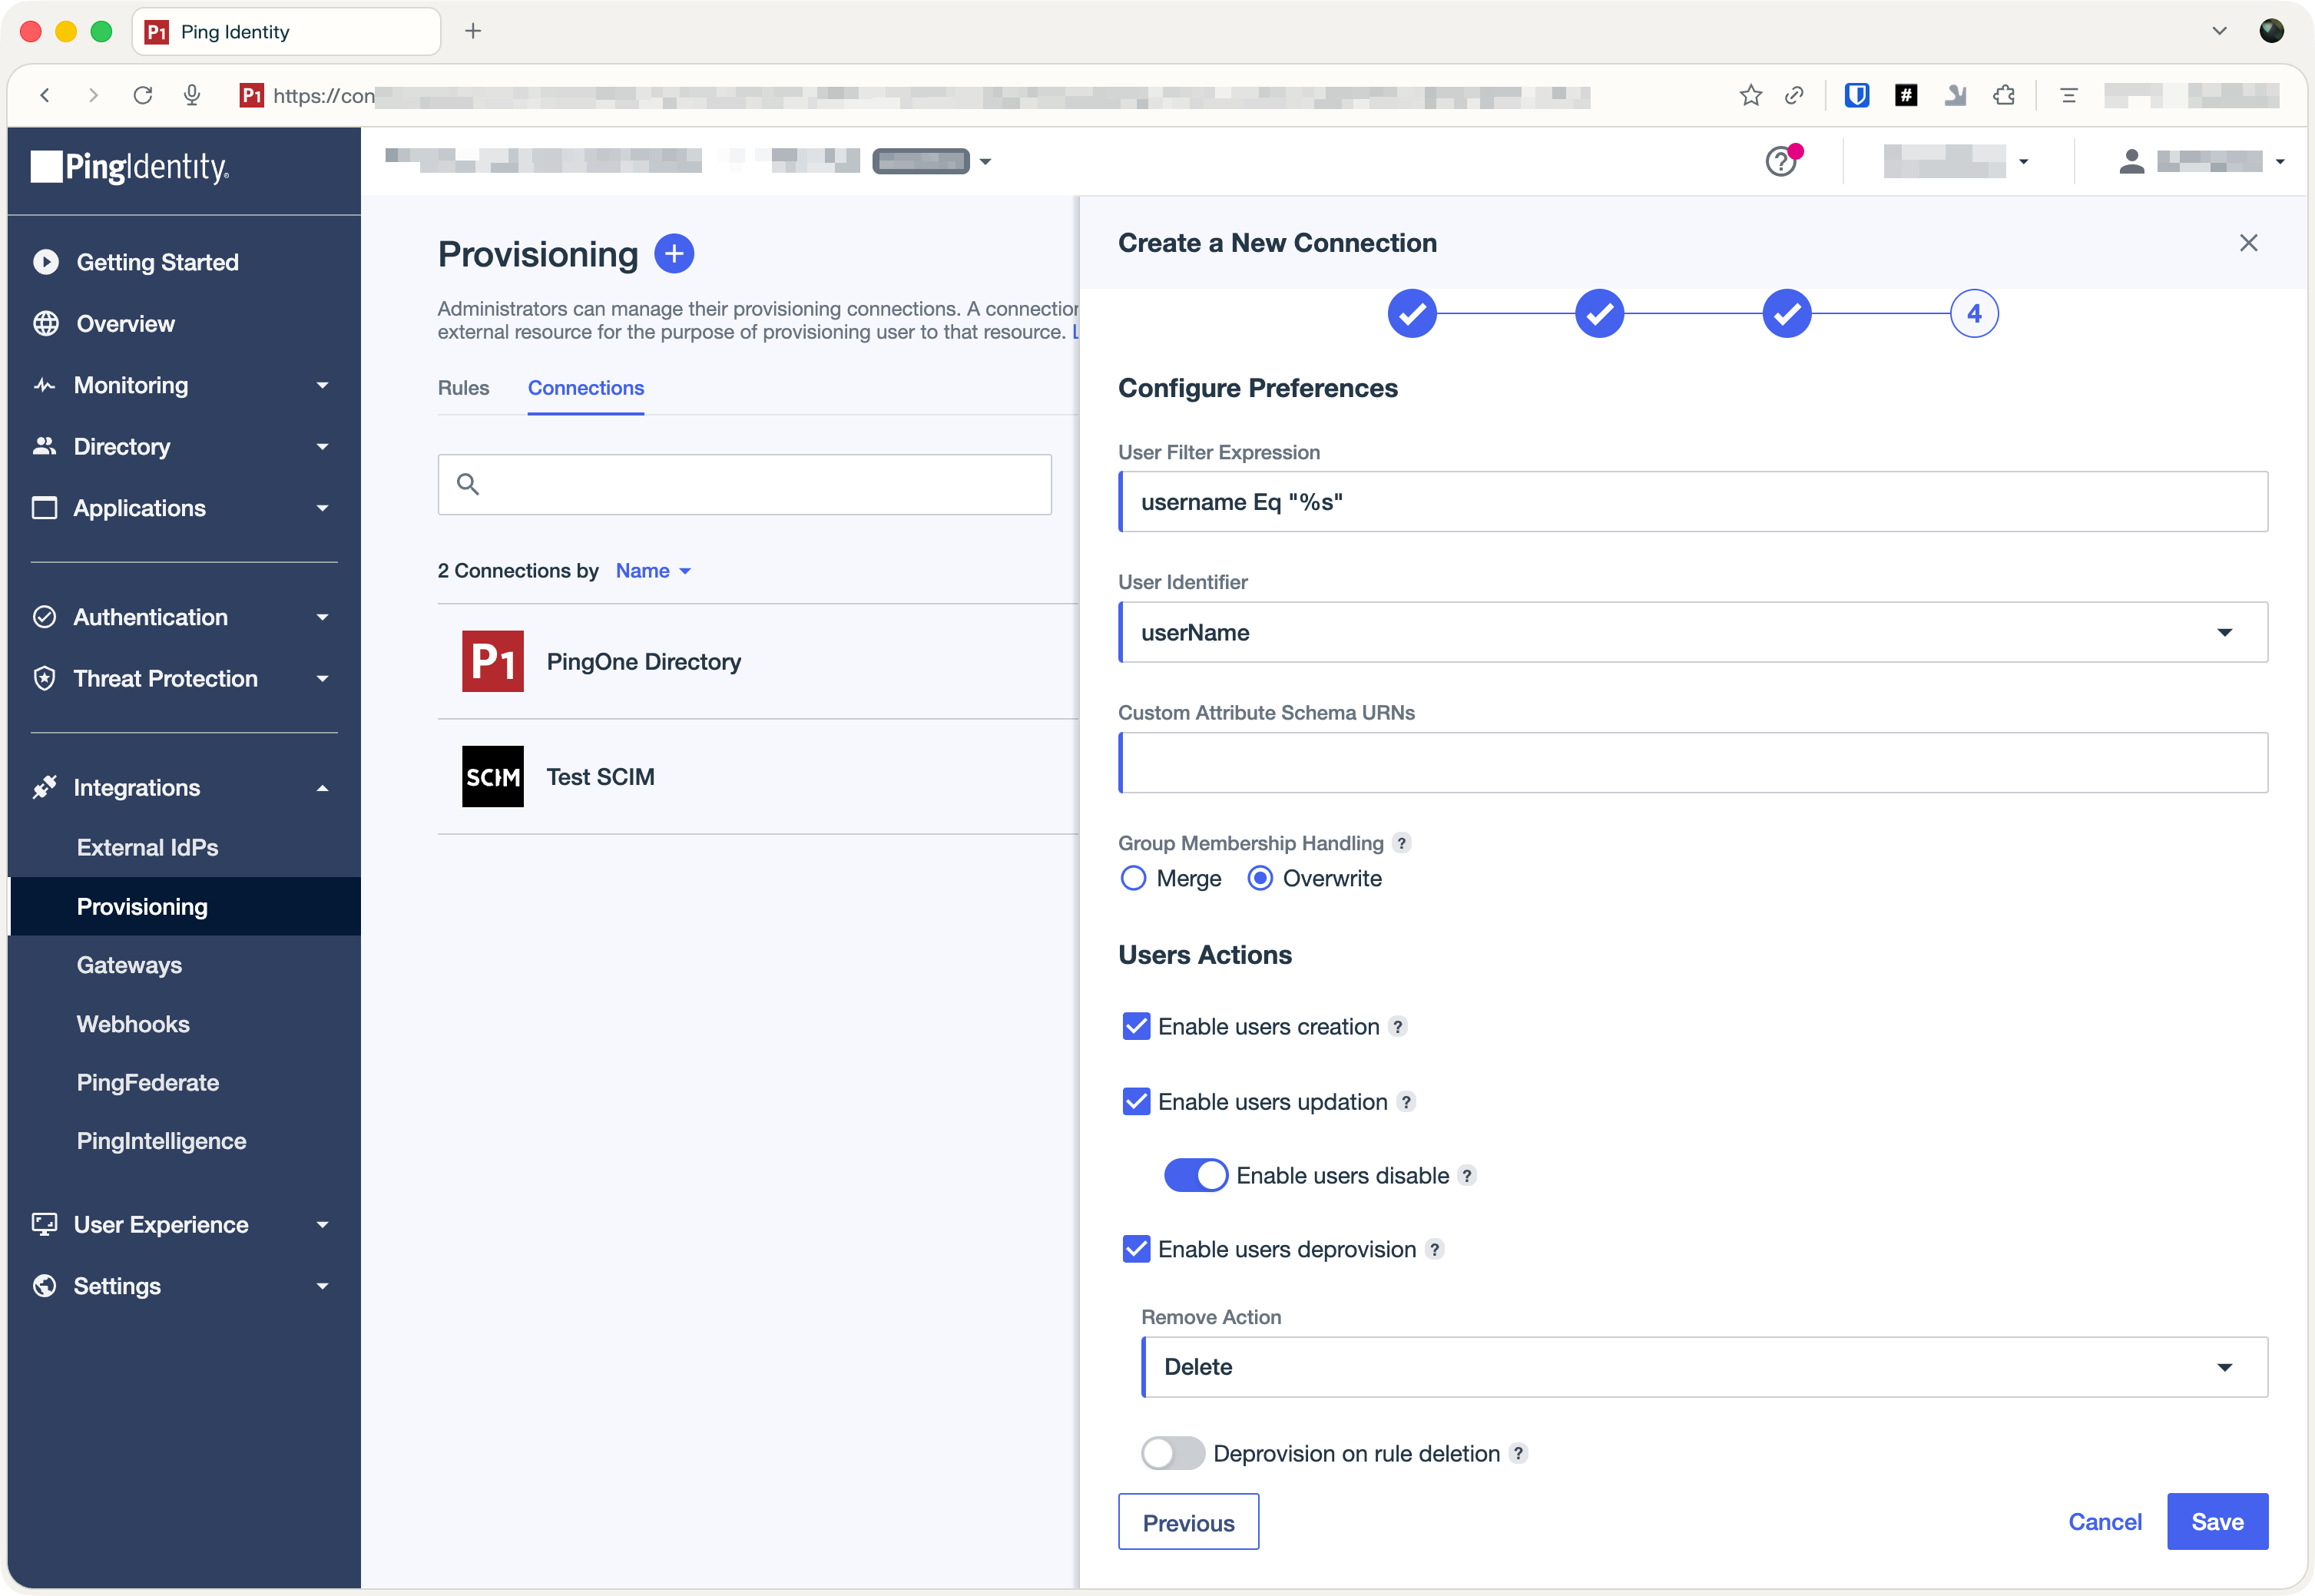
Configure preferences and save
Section titled “Configure preferences and save”Leave all preferences at their default settings and click Save to finish creating the connection.
-
Configure provisioning rules
Section titled “Configure provisioning rules”After creating the connection, you must define the rules for data synchronization. Click the + (plus) icon again and select New Rule from the dropdown menu.
In the rule configuration modal, set the following:
- Source: Select PingOne
- Connection: Choose the connection you created in the previous step
- Name: Provide a meaningful name, such as the name of the application you are onboarding (e.g., “Hero SaaS”)
Click Save to finalize the provisioning setup.
-
Verify the integration
Section titled “Verify the integration”With the setup complete, verify that users and groups are synchronizing correctly:
- Sync a Group: In PingIdentity, create or select a group. This group should appear in the Admin Portal under SCIM Provisioning almost immediately.
- Sync User Data: Add users to that group. Their profile data will be sent to your application and synchronized in real-time.
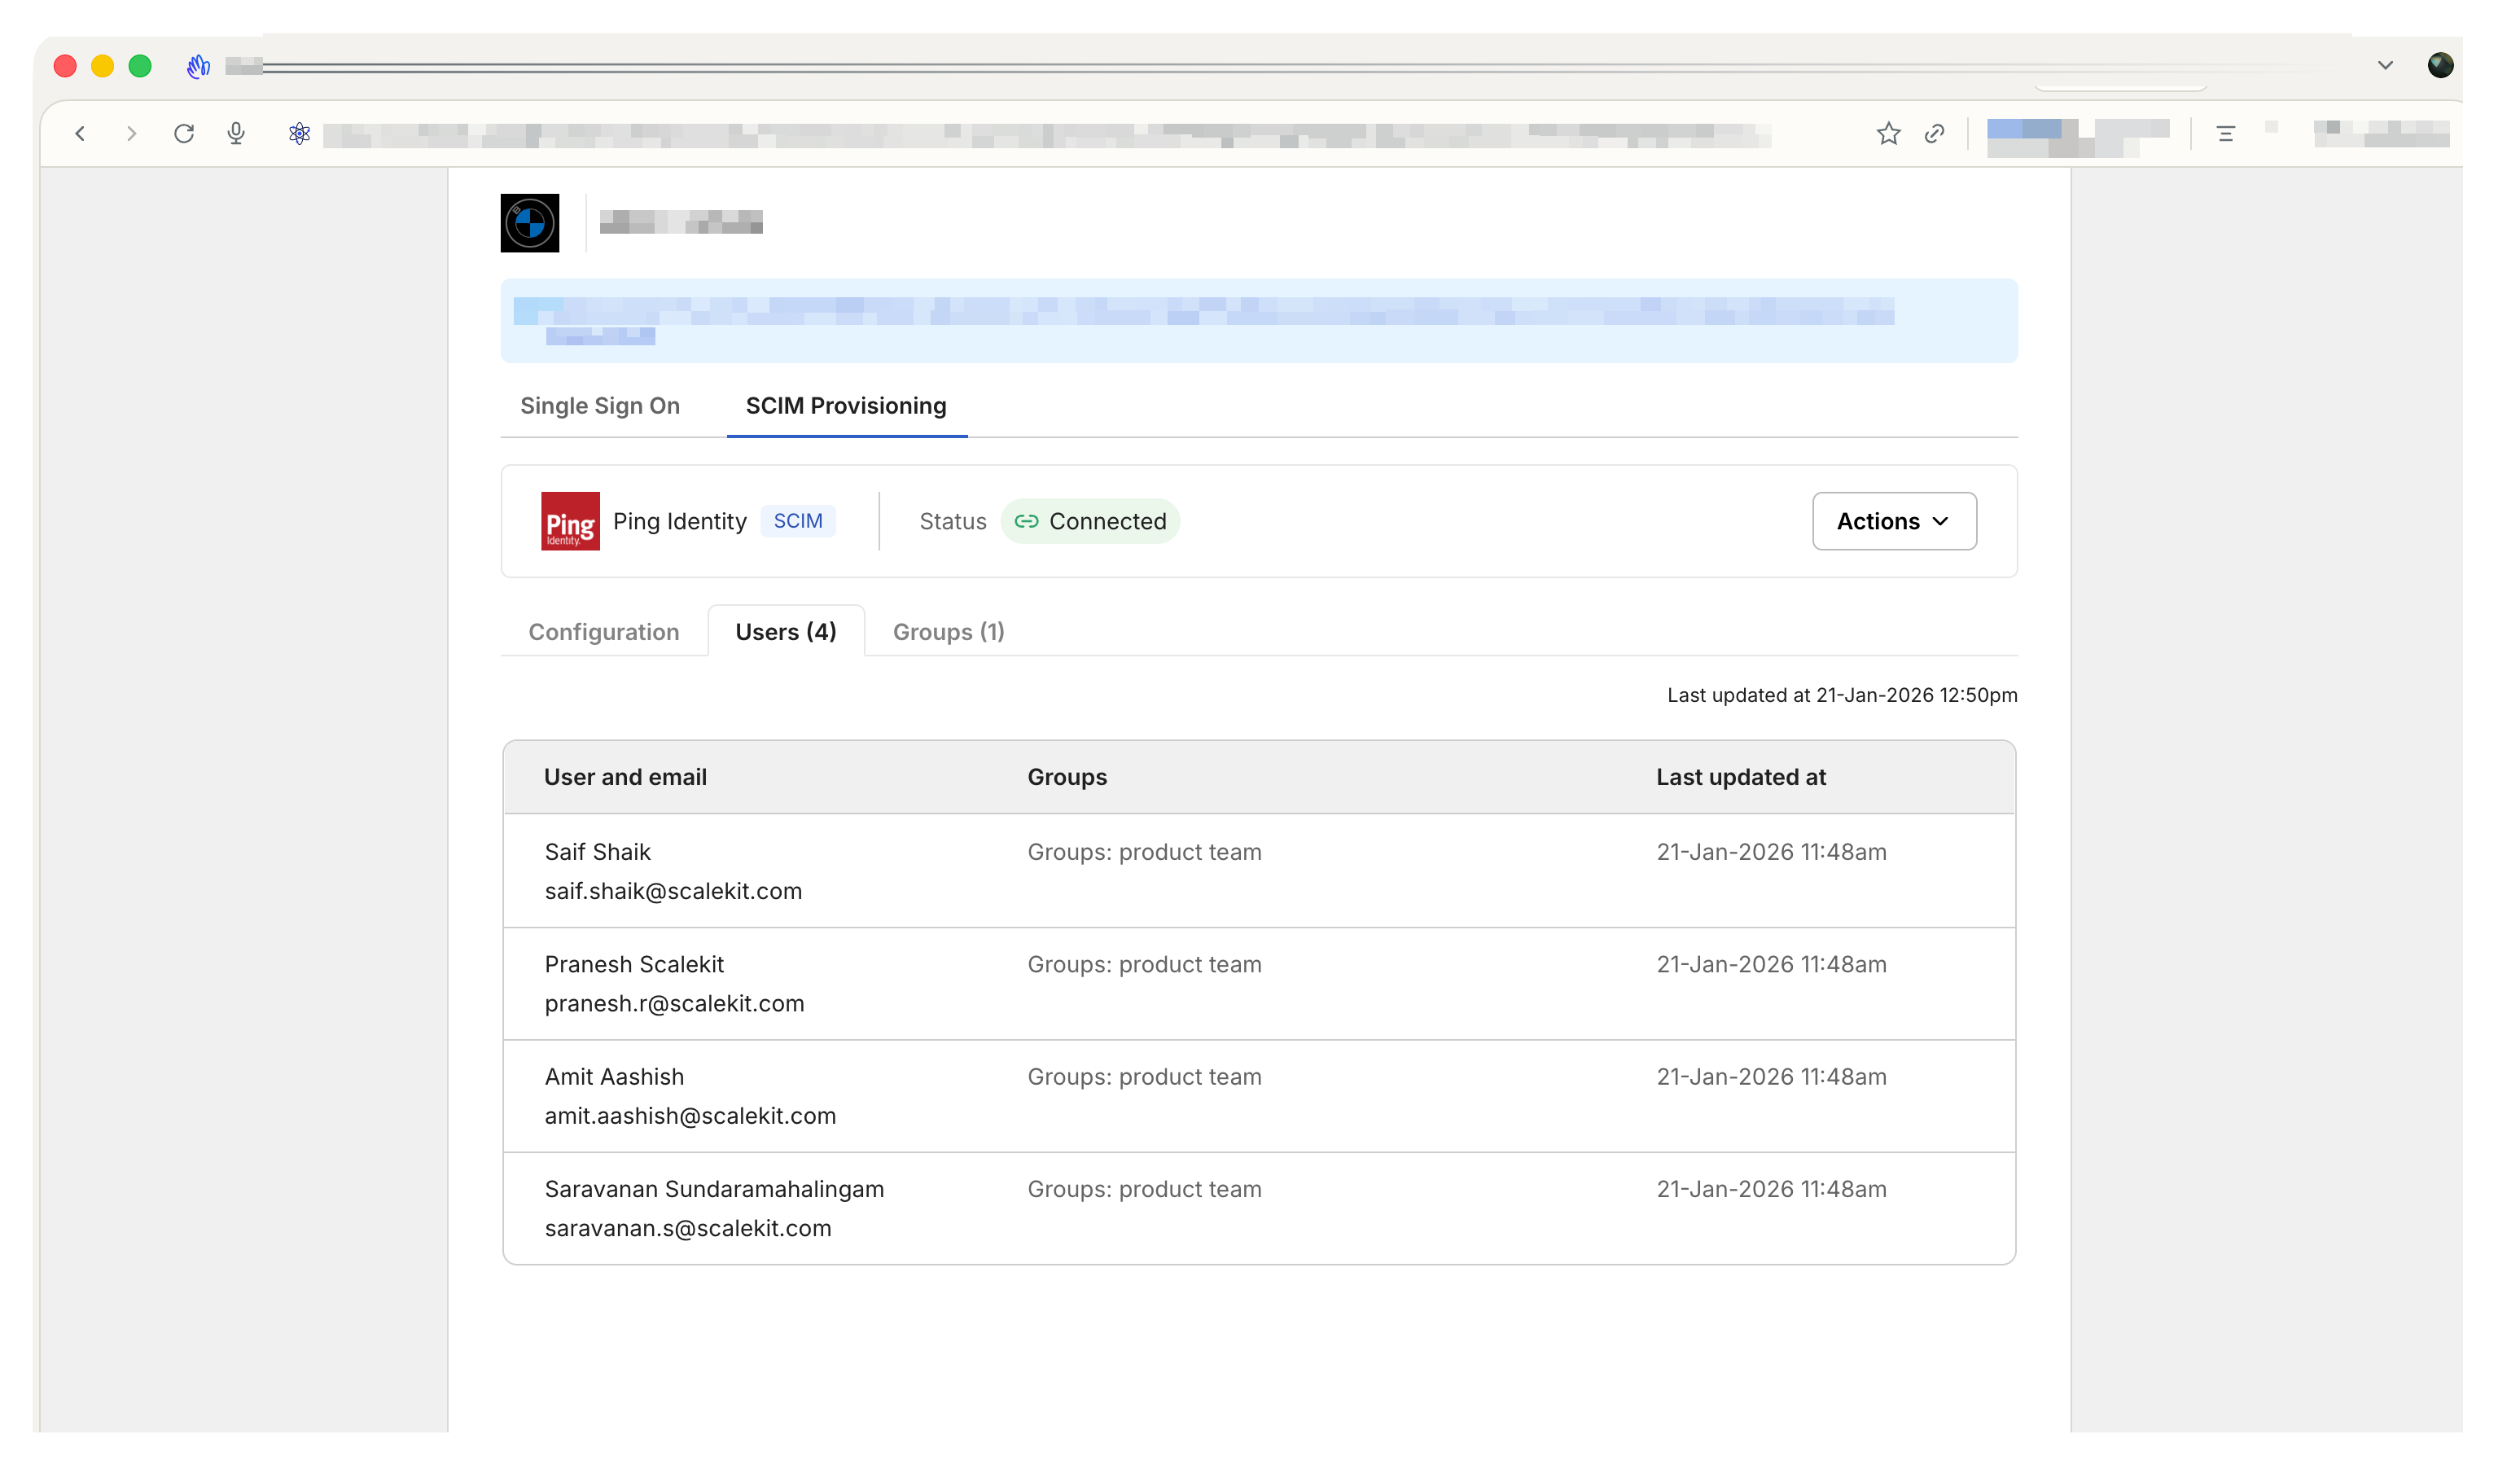
Confirm the synchronization by visiting the Users/Groups tab in the Admin Portal.